I was standing in my hallway last Tuesday, staring at a stack of heavy art books that had been sitting on my floor for three weeks because I was too intimidated by a single, empty patch of drywall. We’ve been conditioned to think that learning how to install a shelf requires a degree in structural engineering or a garage full of industrial power tools, but that’s a lie that keeps our homes cluttered and our minds stressed. Most people fail not because they lack strength, but because they lack a repeatable system for dealing with the tiny, frustrating variables like stud placement and wall anchors.
I’m not here to give you a lecture or a list of overly complicated jargon that makes you want to put the drill back in the box. Instead, I’m going to show you the exact, streamlined process I use to get things off the floor and onto the walls without the headache. We’re going to focus on the essential tools, the right hardware for your specific wall type, and the little tricks that ensure your gear stays exactly where you put it. Let’s clear that clutter so you can finally get back to your life.
Table of Contents
- Step-by-Step Instructions
- Mastering Wall Stud Finder Tools and Essential Hardware
- Choosing the Right Drywall Anchor Types for Stability
- Five Pro-Tips to Save You From a Midnight Cleanup
- The Bottom Line: Do It Once, Do It Right
- The Philosophy of a Solid Shelf
- Getting It Done and Moving On
- Frequently Asked Questions
Guide Overview
Tools & Supplies
- Drill with bits for making holes
- Level to ensure horizontal alignment
- Pencil for marking stud locations
- Measuring tape for precise spacing
- Shelf unit or wood planks (1)
- Shelf brackets (2 or more)
- Wall anchors or screws (1 set)
Step-by-Step Instructions
- 1. First, clear your workspace and grab your gear. You’ll need a drill, a level, a pencil, a stud finder, and the hardware that came with your shelf. I always keep a precision screwdriver in my bag for the smaller screws, but for the heavy lifting, you’ll want a solid power drill. Don’t try to wing this with a kitchen knife or a dull screwdriver; having the right tools is the difference between a ten-minute job and a two-hour headache.
- 2. Locate your studs. This is the most important step if you want to avoid a disaster. Use your stud finder to scan the wall where you want the shelf to live. If you hit a stud, mark it with your pencil. If you can’t find a stud, don’t panic—you’ll just need to use heavy-duty drywall anchors instead. I’ve learned the hard way that skipping this step is a fast track to a pile of broken ceramics on your floor.
- 3. Mark your mounting points. Hold the shelf bracket up against the wall at your desired height. Use your level to make sure it’s perfectly straight—nothing ruins the minimalist aesthetic of a clean room faster than a crooked shelf. Once it’s level, use your pencil to mark exactly where the screw holes are. Double-check your measurements before you even think about touching the drill.
- 4. Drill your pilot holes. If you’re mounting into a stud, drill a small hole first to guide your screws. If you’re using anchors in drywall, drill a hole large enough to fit the anchor snugly. I find that drilling a slightly smaller hole than the anchor itself helps create that tight, secure fit that prevents wobbling later on.
- 5. Secure the brackets. Line up your brackets with the holes you just drilled and drive the screws in. If you’re using anchors, make sure you tap them into the wall with a hammer first so they sit flush against the surface. Tighten them until they’re firm, but don’t go overboard and strip the screw head; steady pressure is your friend here.
- 6. Mount the shelf and test the weight. Place the shelf onto the brackets and secure it with the remaining hardware. Before you go decorating with your heavy books or plants, give the shelf a gentle tug to ensure everything is seated properly. If it feels solid, you’re good to go. Now, stop tinkering and actually enjoy your organized space.
Mastering Wall Stud Finder Tools and Essential Hardware
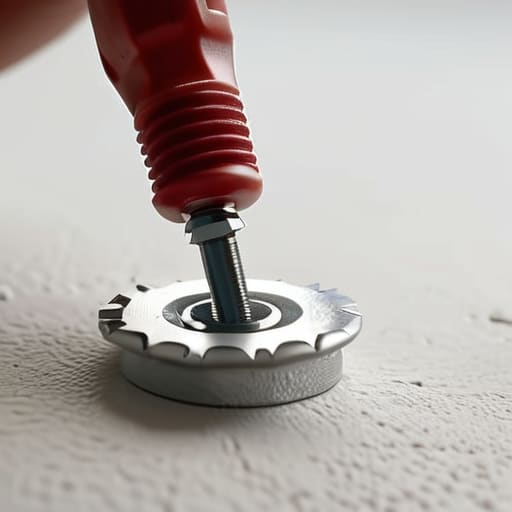
Look, I’ve seen too many people try to hang a heavy book collection only to have the whole thing come crashing down because they relied on luck instead of physics. If you aren’t hitting a stud, you need to be smart about your drywall anchor types. Don’t just grab the cheap plastic sleeves that come in the box; invest in some high-quality toggle bolts if you’re mounting into hollow space. They provide the mechanical grip necessary to keep things from sagging over time.
When it comes to the actual mounting, your choice of floating shelf mounting hardware will dictate how much weight you can actually trust. Before you even pick up the drill, check the manufacturer’s specs. I always keep a mental shelf weight capacity guide in my head: if it’s heavy stoneware or thick textbooks, you absolutely must find those wooden studs. If you miss the stud, ensure your anchors are rated for at least double the expected load. It’s better to spend ten extra minutes verifying your hardware now than spending your entire Saturday cleaning up broken ceramic and crumbling plaster later.
Choosing the Right Drywall Anchor Types for Stability
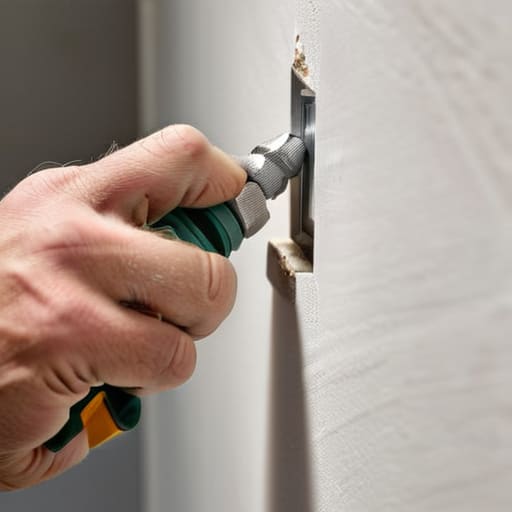
If you’ve ever watched a shelf slowly sag or, worse, tear right out of the wall, you know that the hardware is where most people fail. You can’t just grab whatever plastic sleeve came in the box and hope for the best. When you aren’t hitting a solid stud, your choice of drywall anchor types becomes the difference between a permanent solution and a weekend-ruining mess. For light decor, simple plastic plugs might suffice, but if you’re planning to hold books or heavy kitchenware, you need to step up to something more substantial, like self-drilling anchors or even toggle bolts.
The most important thing to keep in mind is the shelf weight capacity guide provided by the manufacturer. Most people underestimate the sheer force of gravity pulling on a cantilevered load. I always tell myself: if the item is heavy, the anchor needs to be even heavier. Don’t just eyeball it; check the rating on the package. If you’re dealing with something truly massive, you might even need to consider drilling into masonry for shelves if you’re working with brick or concrete. Get the anchor right the first time, and you won’t have to fix it twice.
Five Pro-Tips to Save You From a Midnight Cleanup
- Level it twice, drill once. Don’t trust your eyes or a cheap plastic bubble level; use a solid spirit level and double-check your marks before you commit to the first hole.
- Mind the “ghost” wires. Even if you used a stud finder, keep an eye out for outlets or switches nearby that might indicate a vertical run of electrical wiring.
- Don’t over-tighten the anchors. If you’re using plastic toggles, stop turning the screw the second it feels snug. If you strip the hole, you’re back to square one.
- Test the weight before you decorate. Once the shelf is up, give it a firm (but not violent) press to make sure it’s seated properly before you start loading it up with heavy books.
- Use a vacuum as you go. A quick pass with the shop vac while drilling prevents that fine white drywall dust from coating your entire floor and making a mess you’ll have to clean up later.
The Bottom Line: Do It Once, Do It Right
Never guess when it comes to weight; if you aren’t hitting a stud, ensure your anchors are specifically rated for the load you’re planning to support.
Invest in a decent tool kit now to avoid the frustration of stripped screws or cracked drywall that turns a twenty-minute task into a weekend headache.
Prioritize stability over aesthetics initially—a perfectly level shelf looks terrible if it’s sagging or pulling away from the wall two weeks later.
The Philosophy of a Solid Shelf
A shelf shouldn’t be a constant source of anxiety every time you set a book down; if you take ten extra minutes to prep the hardware and find the stud now, you’re buying yourself months of mental clarity later.
Liam Anders Chen
Getting It Done and Moving On
At the end of the day, installing a shelf isn’t about becoming a master carpenter; it’s about having the right logic applied to the task. You’ve located your studs, you’ve picked the anchors that won’t fail under pressure, and you’ve got your level ready to ensure nothing looks crooked. By following these steps, you aren’t just hanging a piece of wood; you are eliminating a source of clutter and reclaiming your physical space. Don’t let the fear of a stray drill hole stop you. If you do the prep work right, the actual installation becomes a predictable, repeatable system rather than a stressful weekend project.
My philosophy has always been that we shouldn’t spend our limited energy fighting against our environment. Once that shelf is secure and your items are organized, the “work” part of this project is officially over. Now, you can actually enjoy the space you’ve created without that nagging mental weight of unfinished chores. Use this small win to build momentum for the next thing on your list. The goal is to get your house in order so you can stop managing your surroundings and start actually living your life.
Frequently Asked Questions
What should I do if my stud finder keeps giving me false readings or won't find a stud at all?
Look, even the best tools have bad days. If your stud finder is acting up, stop guessing and start testing. First, check your batteries; low power is the number one cause of phantom readings. If that’s not it, try moving away from electrical wires or metal pipes that might be tripping it up. If you’re still getting nothing, ditch the tech for a second and use the “knock test”—listen for the change in hollow vs. solid sound.
Can I actually hang a heavy bookshelf using only drywall anchors, or am I asking for a disaster?
If you’re planning on loading that shelf with heavy hardcovers or a full collection of tech gear, skip the anchors. I’ve seen too many “quick fixes” turn into midnight cleanup sessions when a shelf peels right out of the drywall. Anchors are great for light decor, but for a heavy bookshelf, you need to hit the studs. Don’t gamble with your floor space; find the wood, or don’t bother hanging it.
How do I make sure my shelf is actually level without spending an hour staring at a tiny bubble in a tool?
Look, I’ve spent way too many evenings squinting at a spirit level only to realize the whole thing is crooked. If you want to move fast, skip the tiny bubble and use a laser level. It projects a perfectly straight line across your entire wall, so you can just align your brackets and go. If you don’t have one, a long, stiff straightedge and a smartphone leveling app will get the job done in seconds.
