I was staring at a pile of particleboard scraps and a set of instructions that looked more like a cryptic puzzle than a guide, wondering why I couldn’t just get this one thing right. Most people think you need a professional-grade workshop or a degree in carpentry to create something sturdy, but that’s a lie that keeps most of us stuck with flimsy, mass-produced furniture that wobbles after a month. The truth is, learning how to build a bookshelf isn’t about having the most expensive tools; it’s about understanding a few fundamental mechanical principles and having the discipline to measure twice.
I’ve spent enough time fixing broken things to know that complexity is usually just a mask for poor planning. In this guide, I’m stripping away the fluff and the intimidating jargon to show you a streamlined, systems-based approach to building a shelf that actually holds weight. We’re going to focus on precision, smart material choices, and a workflow that won’t eat up your entire weekend. By the time we’re done, you’ll have a functional piece of furniture and the mental clarity that comes from finally mastering a skill you can actually use.
Table of Contents
Guide Overview
Tools & Supplies
- Circular saw or hand saw for cutting wood to size
- Power drill for driving screws and pilot holes
- Measuring tape for accurate dimensions
- Sandpaper for smoothing rough edges
- Level to ensure the unit is straight
- 1×6 lumber (approx. 4-5 boards of 8ft length)
- Wood screws (1.5 inch, 1 box)
- Wood glue (1 bottle)
- Wood finish or paint (1 can)
Step-by-Step Instructions
- 1. First, don’t just head to the hardware store and grab whatever looks cheap. You need to map out your dimensions and buy high-quality plywood or solid wood—avoid that particle board junk if you actually want this to hold your heavy books without bowing. I always sketch my cut list in my notebook first so I don’t end up making expensive mistakes at the lumber yard.
- 2. Once you have your wood, it’s time to cut your side panels, top, bottom, and shelves. If you don’t own a table saw, most big-box retailers will make the cuts for you, but if you’re doing it yourself, measure twice and cut once is the only rule that matters here. I’ve lost too many good pieces of timber to a rushed measurement, and it’s a waste of both time and money.
- 3. Before you even touch a screw, sand every single piece. Start with a coarser grit to get rid of any factory imperfections and work your way up to a fine grit until the surface feels smooth as glass. If you skip this, you’ll spend the next month fighting splinters every time you reach for a novel.
- 4. Now, let’s talk about the assembly. I prefer using pocket hole joinery because it’s clean, incredibly strong, and keeps the ugly screw heads hidden from view. Lay out your side panels and use a square to ensure everything is perfectly perpendicular; if your frame is even slightly off now, the whole thing will look wonky once it’s standing against the wall.
- 5. Once the main frame is solid, it’s time to install your shelves. I recommend using adjustable shelf pins if you want versatility, but if you want maximum stability, go with fixed shelves that are screwed directly into the sides. Just make sure you pre-drill your pilot holes to prevent the wood from splitting—there is nothing more frustrating than a crack running through a fresh project.
- 6. Don’t forget the back panel. It might seem like an afterthought, but nailing a thin sheet of plywood to the back is what actually prevents the unit from wobbling side-to-side. It’s the difference between a professional-looking piece of furniture and a shaky mess that feels like it might collapse if you sneeze near it.
- 7. Finally, give the whole thing a finish. Whether you’re going with a clear matte wax or a deep stain, apply it in thin, even layers to avoid drips or blotchiness. Once it’s dry, wipe it down, find a permanent spot in your home, and finally enjoy the organized space you just built with your own hands.
Choosing the Right Types of Wood for Shelving
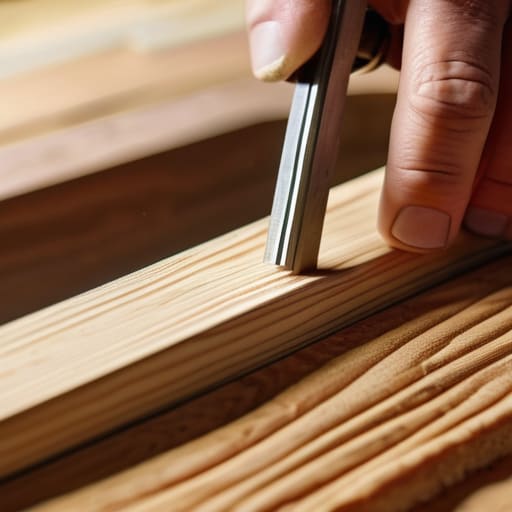
Don’t let the aisles of your local hardware store overwhelm you; choosing the right material is the difference between a piece that lasts a decade and one that bows under the weight of your hardcovers. If you’re looking for something budget-friendly and easy to work with, pine is your best friend. It’s soft, readily available, and perfect when you’re first getting used to measuring and cutting lumber. Just keep in mind that pine is prone to dents, so treat it with a bit of respect.
If you want something more substantial, I usually lean toward hardwoods like oak or maple. They offer superior shelf stability and support, which is crucial if you plan on storing heavy encyclopedias or tech gear. They are harder to dent and hold up beautifully when you eventually start finishing wood with stain or paint. My rule of thumb is simple: match the wood to the load. If you’re building something sleek and minimalist for a small apartment, go with a solid hardwood. If it’s just a simple organizer for a garage, don’t overthink it—just grab something sturdy and get to work.
Essential Woodworking Tools for Beginners
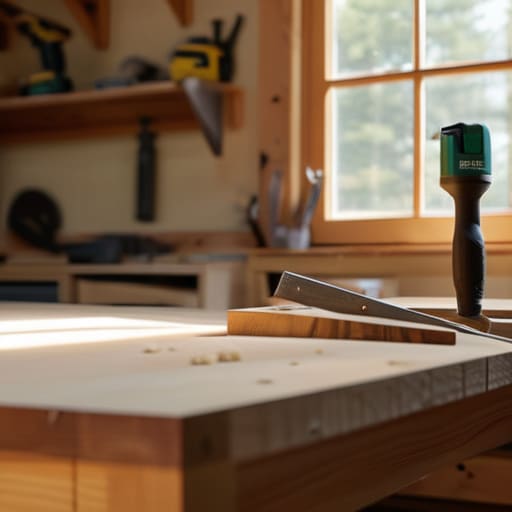
You don’t need a professional workshop or a massive budget to get this done, but you do need the right kit. When I first started out, I thought I could wing it with whatever was in the junk drawer, but that’s a quick way to end up with a wobbly mess. For effective measuring and cutting lumber, invest in a decent combination square and a reliable circular saw or a handsaw if you prefer a slower, more meditative pace. Most importantly, grab a cordless drill; it’s the backbone of assembling wooden furniture without losing your mind or your patience.
Don’t skimp on the clamping game, either. I always say that you can never have too many clamps. They act as your extra set of hands, holding everything steady while the glue sets or the screws go in. If you want to ensure long-term shelf stability and support, a few heavy-duty F-clamps will prevent the wood from shifting mid-project. It’s about setting yourself up for success from the first cut so you aren’t fighting your materials later.
5 Pro-Tips to Keep Your Project from Turning into a Headache
- Don’t skip the pre-drill. If you try to drive a screw directly into hardwood without a pilot hole, you’re either going to split the wood or end up with a stripped head, and neither of those helps us get this done efficiently.
- Measure twice, cut once, and then measure a third time. It sounds like a cliché for a reason; checking your marks again before you pull the trigger on that saw saves you from the frustration of a shelf that’s a quarter-inch too short.
- Use a square, not your eyes. Gravity is unforgiving, and if your frame isn’t perfectly square from the start, your doors won’t hang straight and your books will look like they’re sliding off a sinking ship.
- Sanding is where the real work happens. You can have the best wood in the world, but if you don’t spend the time with a grit progression—starting coarse and moving to fine—it’s going to feel cheap and look amateur.
- Plan for the weight. If you’re planning to store heavy hardcover encyclopedias rather than light paperbacks, increase your shelf thickness or add a center support to prevent that inevitable, depressing sag.
The Bottom Line
Don’t overcomplicate the material choice; pick a wood that fits your budget and your skill level so you don’t end up frustrated halfway through the build.
Invest in a few solid, reliable tools rather than a cheap, massive kit—precision beats quantity every single time when you’re trying to avoid a wobbly mess.
Focus on the structural integrity first; a bookshelf that looks good but sags under weight is just more clutter you’ll have to deal with later.
## The Philosophy of the Build
A bookshelf shouldn’t just be a place to dump your books; it should be a reliable system that holds your life together without you ever having to think about it.
Liam Anders Chen
Getting the Job Done
Building a bookshelf isn’t about achieving some unattainable level of master craftsmanship; it’s about creating something functional that serves your space. We’ve covered the essentials, from selecting a wood type that won’t sag under the weight of your hardcovers to getting your tool kit organized so you aren’t hunting for a screwdriver mid-project. Remember, the goal was to move from a pile of raw lumber to a reliable system for your belongings. If your edges aren’t perfectly laser-straight or your joints have a slight gap, don’t sweat it. What matters is that you followed a process, used the right materials, and now you have a piece of furniture that was built by your own hands rather than shipped in a flat-pack box.
At the end of the day, this project is about more than just storage. It’s about reclaiming a bit of your environment and proving to yourself that you can solve problems through direct action. Every time you slide a book onto a shelf you constructed, you’re reminded that complexity can be managed with a little patience and the right approach. Stop overthinking the “perfect” way to do things and just start building. The clarity you gain from finishing a tangible task is worth far more than the time you spent worrying about it. Now, go grab that notebook, check your measurements one last time, and get to work.
Frequently Asked Questions
How do I make sure the shelves don't sag over time if I'm planning to hold heavy books?
This is the mistake that turns a weekend project into a sagging mess. If you’re loading these with heavy hardcovers, you can’t just rely on luck. First, keep your spans short—don’t exceed 30 inches without support. Second, increase the thickness of your boards; 3/4 inch is the bare minimum, but 1 inch is better. If you’re stuck with thinner wood, screw a solid hardwood “cleat” or lip along the front edge. It acts like a structural beam and keeps everything straight.
I don't have a garage or a workshop; can I actually pull this off in a small apartment?
Honestly? Yes. I’ve built more than a few things on my kitchen table. You don’t need a sprawling workshop to be productive; you just need a better system. Invest in a heavy-duty folding workbench and a shop vacuum to manage the sawdust immediately. If you keep your workspace contained and your tools organized in a single rolling bin, an apartment isn’t a barrier—it’s just a different kind of constraint. Let’s make it work.
What’s the best way to finish the wood so it looks professional without spending hours on it?
Don’t fall into the trap of thinking you need a multi-stage varnish job to make this look good. If you want professional results without the headache, go with a wipe-on polyurethane. It’s much more forgiving than a brush, meaning you won’t deal with annoying drips or uneven streaks. Just sand everything down to a high grit first, wipe it clean, and apply a few thin coats. It’s fast, efficient, and actually looks intentional.
