I was sitting in my home office last Tuesday, trying to hammer out a complex systems report, when that high-pitched, rhythmic screech pierced through my noise-canceling headphones again. It wasn’t just a noise; it was a constant distraction that felt like a tiny glitch in my entire environment. Most people think they need to buy a specialized toolkit or replace the entire hinge assembly just to solve the problem, but that’s a massive waste of time and money. Learning how to fix a squeaky door doesn’t require a degree in mechanical engineering or a trip to the hardware store for expensive, proprietary sprays; it usually just requires identifying the exact point of friction and applying the right kind of simple lubrication.
I’m not here to give you a lecture on home maintenance or a list of twenty different products you don’t need. My goal is to get you in, get you fixed, and get you back to your life with zero wasted effort. In this guide, I’m going to show you the most efficient ways to silence those hinges using tools you likely already have in your junk drawer or kitchen. We’ll skip the fluff and focus on the direct, practical methods to ensure your home stays a quiet, organized sanctuary.
Table of Contents
- Step-by-Step Instructions
- Choosing the Best Lubricant for Door Hinges Without the Mess
- Removing Squeaky Door Noise With Pro Door Hinge Maintenance Tips
- Five Pro Tips to Keep the Silence
- The Bottom Line for a Quieter Home
- The Philosophy of Small Fixes
- Silence the Noise and Reclaim Your Space
- Frequently Asked Questions
Guide Overview
Tools & Supplies
- Screwdriver [to tighten loose hinge screws]
- Cleaning cloth [to wipe away old grease and dust]
- Lubricant [1 can of silicone spray or a tube of lithium grease]
- Cotton swabs [2-3 pieces for precise application]
Step-by-Step Instructions
- 1. First, identify the exact source of the noise. Open and close the door slowly, moving it through its full range of motion, to pinpoint which hinge is the culprit. Sometimes it’s not just one; if you hear a consistent groan, you might need to treat the entire assembly.
- 2. Grab your tools. You don’t need a massive workshop for this, but I always keep a small kit handy. You’ll want a screwdriver (manual is better to avoid stripping the screw heads), some paper towels, and your lubricant of choice. If you’re like me and value precision, a small can of silicone spray or even a bit of white lithium grease works wonders.
- 3. Remove the pin. This is the part most people skip because they’re afraid of making a mess, but it’s the only way to do it right. Use your screwdriver to tap the hinge pin upward from the bottom until it pops out. Pro tip: Place a piece of cardboard or a towel underneath so you don’t lose the pin or scratch your floor.
- 4. Clean the hardware. Once the pin is out, you’ll likely see a buildup of dark, gritty residue—that’s old, dried-up grease mixed with dust. Take a paper towel and wipe the pin clean until it’s smooth. If there’s stubborn grime, a quick scrub with a bit of steel wool will make it feel brand new.
- 5. Apply the lubricant. Don’t overdo it; we’re aiming for efficiency, not a greasy mess. Apply a thin, even layer of lubricant directly to the pin. If you’re using a spray, aim for the joints of the hinge itself. You want just enough to coat the metal without it dripping down your door frame and ruining the finish.
- 6. Reinsert the pin. Slide the lubricated pin back into the hinge and tap it home with the handle of your screwdriver. Give the door a few test swings to work the oil into the mechanism. If it still sounds a bit “crunchy,” you might need to repeat the process or add a tiny bit more lubricant.
- 7. Wipe away the excess. This is the step that separates a professional job from a messy one. Take a clean cloth and wipe down the hinge and the pin to remove any stray oil. This prevents dust from sticking to the hinge later on and keeps your home looking as clean as your schedule.
Choosing the Best Lubricant for Door Hinges Without the Mess
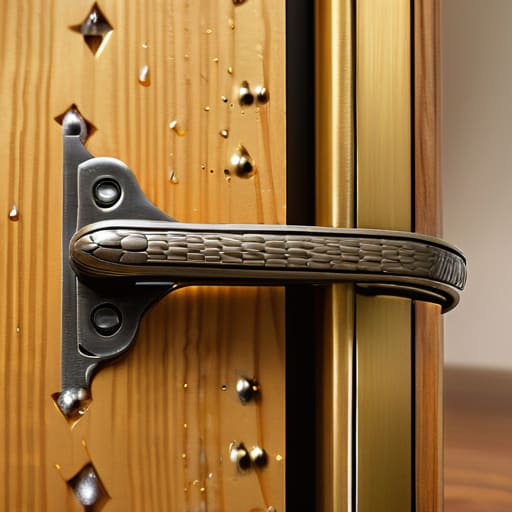
Don’t just grab the first oily can you find in the junk drawer. I’ve learned the hard way that using the wrong stuff can actually make your life more complicated—usually by leaving a sticky, dust-collecting residue that makes the problem worse in a month. If you’re debating WD-40 vs silicone spray for doors, here’s the reality: standard WD-40 is a great cleaner and penetrant to break up old grime, but it’s a poor long-term lubricant because it evaporates quickly. For a solution that actually lasts, I always reach for a high-quality silicone spray or a lithium grease. These stay where you put them and won’t attract the kind of grit that turns your hinges into a grinding mess.
When it comes to lubricating door hinges, my rule of thumb is to prioritize cleanliness and precision. If you use a spray, use a straw attachment to target the pin directly rather than spraying wildly and coating your door frame in oil. If you want to be truly methodical, a small dab of white lithium grease on a rag is the cleanest way to apply it. It keeps the application contained, prevents drips, and ensures you’re spending your time fixing the problem rather than cleaning up a mess.
Removing Squeaky Door Noise With Pro Door Hinge Maintenance Tips
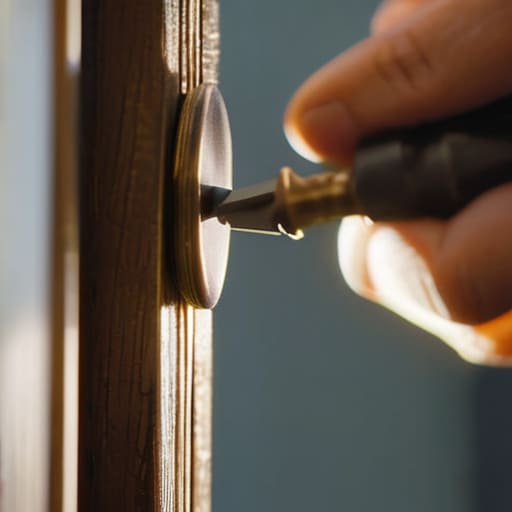
Once you’ve applied the lubricant, don’t just walk away. To truly master removing squeaky door noise for the long haul, you need to address the physical stability of the hinge itself. I’ve found that a lot of noise actually stems from micro-movements caused by hardware that has slightly backed out over time. Grab that precision screwdriver from your bag and check if the screws are seated firmly. Tightening loose door hardware is a five-second task that prevents the metal-on-metal grinding that leads to those annoying shrieks in the first place.
While you’re at it, take a moment to inspect the hinge pins for any signs of excessive wear or unevenness. If the door feels heavy or drags against the frame, the issue might be deeper than just a lack of oil. Incorporating these small door hinge maintenance tips into your quarterly home reset ensures you aren’t constantly playing whack-a-mole with household annoyances. It’s about building a system where things just work, allowing you to focus on your actual priorities rather than a nagging sound in the hallway.
Five Pro Tips to Keep the Silence
- Don’t just spray and pray. If you just spray lubricant on the outside of the hinge, most of it won’t even reach the pin where the friction actually is. You need to get the oil inside the mechanism to actually solve the problem.
- Use a rag to catch the drips. I’ve learned the hard way that a tiny bit of excess oil on your door frame is a nightmare to clean up later. Keep a microfiber cloth handy to wipe away any runoff immediately.
- Check for loose screws while you’re at it. Sometimes that “squeak” is actually just a hinge shifting because a screw has backed out. Since you’re already working on the door, grab your screwdriver and tighten everything up.
- Avoid heavy kitchen oils. I know it’s tempting to grab whatever is in the pantry, but vegetable or olive oil will eventually gum up and attract dust, turning your quick fix into a sticky, grinding mess. Stick to dedicated lubricants.
- Listen to the rhythm. After you apply the lubricant, swing the door back and forth several times. This helps work the oil down the pin and lets you hear if the noise is actually gone or if you need a second pass.
The Bottom Line for a Quieter Home
Don’t let a minor annoyance become a mental drain; a five-minute fix can reclaim your focus and peace of mind.
Choose the right lubricant—like silicone or lithium grease—to avoid the greasy, dusty mess that standard oils often leave behind.
Treat hinge maintenance as a small, repeatable system; a quick check every few months prevents the squeak from ever coming back.
The Philosophy of Small Fixes
“A squeaky door isn’t just a minor annoyance; it’s a tiny, constant leak in your mental bandwidth. Fix the friction, reclaim your focus, and stop letting small household chaos dictate your peace of mind.”
Liam Anders Chen
Silence the Noise and Reclaim Your Space
At the end of the day, fixing a squeaky door isn’t just about the mechanics; it’s about removing a tiny, persistent friction point from your environment. We’ve covered the essentials: selecting the right lubricant to avoid a greasy mess, cleaning out the old grit from your hinges, and applying the fix with precision. Whether you opted for a quick spray or a more thorough deep clean, the goal was to eliminate that auditory distraction. Once you’ve applied the right tension and lubrication, that constant, irritating screech should be a thing of the past. You’ve successfully addressed a small failure in your home’s system, and now your space can finally return to its intended state of quiet efficiency.
I’ve learned through years of managing chaotic operations that the biggest stressors often come from these small, unaddressed irritations. A squeaky door might seem trivial, but it’s a symptom of neglect that pulls at your focus every time you walk through a room. By taking ten minutes to fix it today, you aren’t just repairing a hinge; you are practicing the art of maintaining your peace. Don’t let the little things pile up until they feel overwhelming. Fix the small breaks, streamline your surroundings, and keep your mental bandwidth clear for the things that actually matter. Now, go enjoy the silence.
Frequently Asked Questions
What should I do if the squeak persists even after I've lubricated the hinges?
If the squeak is still haunting you, the lubricant probably didn’t reach the actual friction point. You likely have a buildup of grit or a worn-out pin. Pull the hinge pins entirely, wipe them down with a clean rag, and check for any scoring or rust. If they look smooth, re-apply a bit of grease directly to the pin before sliding it back in. If the pin is bent or heavily pitted, it’s time to just replace the hinge.
Is it safe to use common household items like cooking oil or WD-40 if I don't have proper lubricant on hand?
Look, I get the temptation to grab whatever’s in the pantry when a noise is driving you crazy, but don’t do it. Cooking oil is a disaster waiting to happen—it goes rancid and turns into a sticky, dust-trapping sludge that’ll make the squeak ten times worse later. As for WD-40, it’s a great cleaner, but it’s a terrible long-term lubricant. Use it to clean the gunk out, but follow up with actual grease or silicone spray.
How often should I actually be doing this maintenance to prevent the noise from coming back?
Don’t overthink it—you don’t need a monthly schedule for this. For a standard home, I aim for a quick check every six months. If you have high-traffic doors or live in a humid area where metal reacts faster, maybe hit them every three months. Honestly, just listen. The moment you hear that first tiny protest from the hinge, grab your kit and fix it. Prevention is much easier than troubleshooting a constant annoyance.
