I was staring at a wobbling, particle-board catastrophe at 11:00 PM last Tuesday, wondering why my “ergonomic” setup felt more like a structural hazard. Most people think that learning how to build a desk requires a massive workshop, a degree in carpentry, or a mountain of expensive power tools that you’ll only use once. That is a complete myth. In reality, building a workspace that actually supports your focus is less about master craftsmanship and more about eliminating unnecessary friction through smart, modular design.
I’m not here to give you a lecture on fine woodworking or sell you on a complex project that eats your entire weekend. Instead, I’m going to show you a streamlined, systems-based approach to constructing a solid, minimalist workstation using basic components. We are going to skip the fluff and focus on the exact measurements, materials, and assembly steps you need to create a surface that stays level and stays functional. Let’s cut through the clutter and get your workspace built so you can get back to the work that actually matters.
Table of Contents
- Step-by-Step Instructions
- Choosing the Best Wood for Office Desks Without the Stress
- Essential Woodworking Tools for Beginners to Simplify Your Build
- Five Pro-Tips to Keep Your Build from Becoming a Project Nightmare
- The Bottom Line: Build for Utility, Not Just Looks
- The Philosophy of the Build
- Final Thoughts on Your New Workspace
- Frequently Asked Questions
Guide Overview
Tools & Supplies
- Power Drill for driving screws
- Circular Saw for cutting wood to size
- Sandpaper for smoothing surfaces
- Tape Measure for accurate dimensions
- Wood Planks (1 desktop piece and 4 legs)
- Wood Screws (1 box of assorted sizes)
- Wood Glue (1 bottle)
- Wood Stain or Paint (1 can)
Step-by-Step Instructions
- 1. First, clear your workspace and lay out your materials. I’ve learned the hard way that hunting for a missing screw mid-build is a massive productivity killer. You’ll need your desktop slab (I recommend a solid butcher block or a thick piece of birch plywood), your legs—whether they’re metal trestles or DIY wooden ones—and a set of high-quality wood screws. Double-check your measurements against the floor space before you even touch a tool; there’s nothing worse than finishing a project only to realize it blocks your walking path.
- 2. Prep the underside of your desktop. If you’re using a raw wood slab, this is the moment to sand it down. I keep a fine-grit sandpaper in my kit for a reason: you want a surface that feels smooth to the touch, not something that’s going to give you splinters while you’re typing. Once it’s smooth, wipe it clean with a microfiber cloth to ensure there’s zero dust left behind, or your finish will look like a mess.
- 3. Map out your leg placement. Don’t just eye it; use a tape measure to ensure the legs are perfectly centered or aligned with your intended ergonomic setup. I usually mark the drill points with a pencil, but here’s the pro tip: always drill pilot holes. If you try to drive a screw directly into hardwood without a pilot hole, you risk splitting the wood, and once that happens, the structural integrity is shot.
- 4. Secure the legs to the desktop. Align your legs with the marks you made and start driving your screws in. I prefer using a cordless drill for the heavy lifting, but switch to a manual screwdriver for the last few turns to avoid over-tightening. You want the connection to be rock-solid, but you don’t want to strip the screw heads or crush the wood fibers.
- 5. Level the desk and finalize. Once the legs are attached, flip the desk onto its feet—get a friend to help if it’s heavy, I don’t want you straining your back. Place it in its permanent home and check for wobbles. If it’s uneven, most adjustable feet can be twisted to compensate. If you’re using raw wood, this is also the time to apply your oil or sealant. It’s a small, repeatable process that ensures your desk lasts for years instead of months.
- 6. Cable management (the most overlooked step). A beautiful desk is ruined by a “spaghetti mess” of wires hanging off the back. Since we’re building for efficiency, I always mount a simple cable tray or even just a few adhesive clips underneath the desktop. Getting your power strips and cords organized right now means you won’t have to re-engineer your entire setup a week from now when the clutter starts driving you crazy.
Choosing the Best Wood for Office Desks Without the Stress
When you’re staring at a lumber yard or scrolling through hardware store websites, the sheer variety of options can feel overwhelming. My advice? Don’t overthink it. If you want something that balances durability with a clean aesthetic, look for hardwoods like oak or walnut. They are the gold standard when building a computer workstation because they can handle the weight of heavy monitors and hardware without bowing over time. If you’re on a tighter budget, pine is a solid entry point, but be prepared to do a bit more sanding to get that smooth, professional finish I’m always chasing.
The real secret to a successful build isn’t just the species of wood, but how well it fits your specific workflow. Before you buy anything, I highly recommend cross-referencing your needs with a custom desk dimensions guide to ensure your chosen slab won’t feel cramped once your gear is actually on it. You want a surface that feels intentional, not something you’re constantly bumping into. Stick to simple, straight-grained woods to keep that minimalist vibe—it makes the whole project feel much more cohesive and significantly less stressful.
Essential Woodworking Tools for Beginners to Simplify Your Build
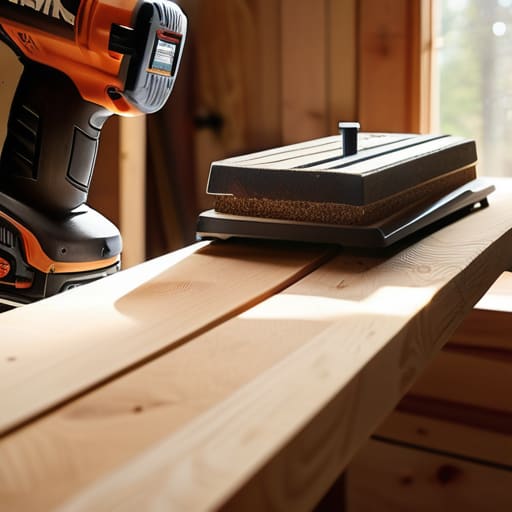
Look, you don’t need a professional-grade workshop or a garage full of expensive machinery to get this done. When I first started working on projects, I thought I needed every gadget under the sun, but that just leads to clutter and decision paralysis. For this build, focus on the basics: a reliable drill, a circular saw with a sharp blade, and a solid set of clamps. If you’re looking for the most effective woodworking tools for beginners, invest in a decent orbital sander. It’ll save you hours of manual labor and ensure your desktop is smooth enough that you won’t feel every single grain while you work.
Precision is where most people trip up, so don’t skimp on your measuring tape or a high-quality speed square. I always keep my precision screwdriver handy for the smaller hardware, but for the heavy lifting, accuracy is your best friend. Having the right tools doesn’t just make the job easier; it prevents the frustration of misaligned joints that can ruin your entire afternoon. Keep your kit lean, keep it sharp, and let’s get to the actual construction.
Five Pro-Tips to Keep Your Build from Becoming a Project Nightmare
- Measure twice, cut once, and then measure a third time. It sounds like a cliché for a reason; there is nothing more frustrating than realizing you’re a quarter-inch short on a leg after you’ve already finished the sanding.
- Don’t skip the sanding phase. I know it’s tedious, but a smooth surface is the difference between a desk that feels like a premium piece of furniture and one that leaves you with splinters every time you reach for your coffee.
- Invest in decent wood glue and clamps. You can have the best joinery in the world, but if your glue-ups are sloppy or your clamps slip, the structural integrity of your workspace is going to be compromised.
- Level your workspace before you start. If you’re building on an uneven floor, you’re going to bake those errors right into the desk, and you’ll spend the rest of your life trying to shim it with folded-up cardboard.
- Keep your workspace organized as you go. I always keep my precision screwdriver and a small notebook nearby to jot down dimensions immediately; if you rely on memory while you’re deep in the build, you will make a mistake.
The Bottom Line: Build for Utility, Not Just Looks
Don’t overcomplicate the design; a stable, flat surface is more valuable than a complex aesthetic that’s a pain to maintain.
Invest in quality wood and the right basic tools upfront to avoid the frustration of a wobbly desk or a wasted weekend.
Focus on creating a system that works for your specific workflow, so your desk becomes a tool for productivity rather than another thing you have to manage.
The Philosophy of the Build
“A desk isn’t just a slab of wood on four legs; it’s the foundation of your focus. If your workspace is a compromise, your productivity will be too. Build it right once, so you never have to think about it again.”
Liam Anders Chen
Final Thoughts on Your New Workspace
Building this desk isn’t just about joining pieces of wood together; it’s about the intentionality you put into your environment. We’ve covered how to select a wood species that won’t break the bank, the specific tools you actually need to get the job done, and the assembly steps to ensure your setup is rock solid. Remember, you don’t need a professional workshop to achieve a high-quality result. By focusing on precision and simple systems rather than expensive, over-complicated machinery, you’ve managed to create something far more valuable than a store-bought piece of particle board. You’ve built a foundation for your daily productivity.
Now that the sawdust has settled and the screwdriver is back in my bag, it’s time for the most important part: actually using the space. A desk is just a tool, but when it’s built by your own hands, it becomes a dedicated zone for clarity and focus. Don’t let the perfectionism of a first-time build hold you back; there might be a tiny gap or a slight imperfection, but that’s just proof of a life lived actively rather than consumed by digital clutter. Get your gear set up, clear your mind, and start doing the work that actually matters to you.
Frequently Asked Questions
How do I make sure the desktop is perfectly level so my coffee doesn't slide off or my monitor wobbles?
Nothing ruins a clean workspace faster than a wobbling monitor or a coffee mug that feels like it’s on a tilt. Before you mount anything, lay a long level across the surface. If it’s uneven, don’t sweat it—don’t try to sand the whole thing down. Just use adjustable furniture feet or even small, discrete felt pads under the legs. It’s a quick, non-destructive fix that keeps your setup stable and your focus sharp.
What’s the best way to hide all the messy cables without turning my clean setup into a rat's nest?
Nothing kills a clean workspace faster than a “rat’s nest” of tangled wires. I swear by a two-pronged approach: first, get a cable management tray that mounts directly under your desk to catch the heavy power bricks. Second, use Velcro ties—never plastic zip ties—to bundle the remaining lines. Zip ties are too permanent and a pain to redo. Keep it modular, keep it organized, and your mind will stay as clear as your desk.
I’m worried about the cost—are there cheaper ways to get a solid wood look without spending a fortune at the lumber yard?
Look, I get it. High-end hardwood prices can turn a weekend project into a financial headache real fast. If you want that solid wood aesthetic without the premium price tag, try reclaimed pallet wood—just sand it well and check for nails. Alternatively, look into high-quality plywood with a real wood veneer. It gives you the structural stability I love in engineering, but with a surface that looks and feels like the real deal.
