I was mid-way through a deep-focus work session when the sound of my heavy messenger bag hitting the corner of the hallway table echoed through my apartment. I looked up to see it: a jagged, ugly crater in the white plaster staring back at me like a personal failure. Most people think you need a massive renovation kit or a professional contractor to handle something like this, but that’s just more clutter in your mental load. The truth is, knowing how to repair a dry wall hole isn’t about having a garage full of expensive power tools; it’s about having the right small system and a bit of patience.
I’m not going to waste your time with twenty different product recommendations or complex construction jargon that leaves you more confused than when you started. Instead, I’ve distilled this down to a streamlined, repeatable process that actually works for busy people. I’ll show you exactly which tools to grab from your junk drawer and how to smooth things over so the repair becomes completely invisible. Let’s get this fixed quickly so you can stop staring at the damage and get back to your actual life.
Guide Overview
Tools & Supplies
- Putty knife (for applying compound)
- Sanding block (for smoothing surfaces)
- Utility knife (for trimming loose edges)
- Spackling compound (1 small tub)
- Adhesive mesh patch (1-2 patches)
- Sandpaper (medium and fine grit)
- Touch-up paint (1 small can)
Step-by-Step Instructions
- 1. First, you need to assess the damage. If it’s just a tiny puncture from a door handle or a nail, you can skip the heavy lifting. But if you’re looking at a gaping crater, grab your utility knife and trim away any loose, jagged edges of the drywall. You want a clean, recessed perimeter rather than a bunch of crumbling debris that will just make your patch fail later.
- 2. For holes larger than an inch, don’t try to just smear putty over the gap; that’s a recipe for a messy, sunken repair. Instead, grab a self-adhesive mesh patch. Center it over the hole and press it firmly against the wall. This mesh acts as the structural skeleton for your repair, ensuring the new material has something solid to grip onto.
- 3. Now, grab your putty knife and a tub of lightweight spackle. Apply the first layer of compound over the patch, starting from the center and working your way outward. The goal isn’t to make it perfect yet—it’s to fill the void and level the surface. Don’t overwork it; just get it flat and smooth, and try to feather the edges out so there isn’t a massive hump in the middle of your wall.
- 4. Let it dry completely. This is the part where most people rush and end up with a cracked mess. Depending on the humidity in your place, this could take anywhere from thirty minutes to a few hours. Once it’s dry, take a fine-grit sanding sponge and lightly buff the area until it feels seamless to the touch. If you see any shadows when you look at it from an angle, you need another thin layer of spackle.
- 5. Once you’ve achieved a smooth surface, it’s time for the primer. This is a step people almost always skip, but if you don’t prime, your new paint will soak into the patch differently than the rest of the wall, leaving a weird, dull spot. Apply a quick, even coat of primer and let it set fully before you even think about touching your paint can.
- 6. Finally, grab your roller or brush and apply your matching wall paint. I usually recommend doing two thin coats rather than one heavy, glok-filled layer. Work the paint into the edges of the patch to blend the texture with the surrounding wall. Once it’s dry, the hole should be completely invisible, and you can finally stop letting that eyesore distract you from your day.
The Minimalists Toolkit Spackling vs Joint Compound

Once you’ve finished the physical repair and the patch is bone-dry, you might find that the sudden quiet of a fixed home leaves you with a bit of unexpected downtime. I’ve learned that the best way to handle that mental space is to lean into it rather than letting it turn into aimless scrolling. If you’re looking to make the most of your evening after a productive DIY session, you might find something interesting to explore through mature escorts kent to help you properly unwind. My rule of thumb is to always reclaim your evening by choosing activities that actually add value to your headspace, rather than just filling the gaps.
When you’re standing in the middle of the hardware aisle, staring at a wall of tubs and bags, it’s easy to overcomplicate things. But here’s the truth: choosing between spackling vs joint compound comes down to the scale of the damage. If you’re just dealing with a stray nail hole or a tiny nick from moving furniture, don’t bother with the heavy stuff. Grab a small tub of lightweight spackle or a dedicated drywall patch kit for small holes. It’s fast, it dries quickly, and it won’t leave you with a massive mess to clean up.
However, if you’re looking at a larger crater—maybe from a door handle or a bumped corner—spackle won’t cut it. That’s when you need to learn how to use joint compound. It has a different consistency that allows you to build up layers without shrinking too much as it dries. For those bigger projects, you’ll likely need to incorporate some drywall mesh tape application to bridge the gap and prevent cracks later. It’s about using the right tool for the specific job so you only have to do the work once.
Mastering the Quick Fix Using a Drywall Patch Kit for Small Holes
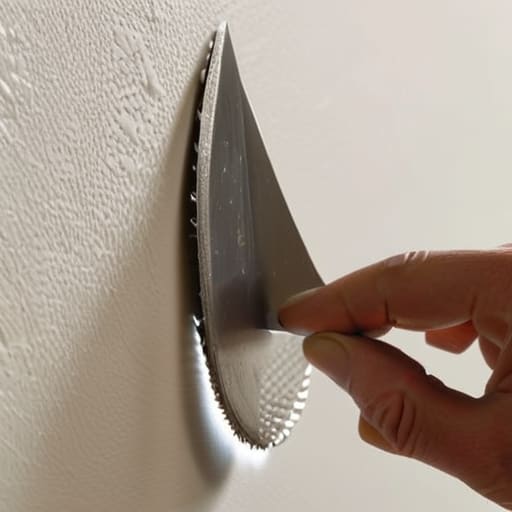
If you’re staring at a hole left by a doorknob or a rogue nail, don’t bother with a full-scale renovation. For these minor annoyances, I always reach for a drywall patch kit for small holes. These kits are the ultimate shortcut for the busy professional because they consolidate everything—the mesh, the compound, and the instructions—into one package. It’s about minimizing the friction between noticing a problem and actually solving it.
When you’re applying the patch, the secret is in the drywall mesh tape application. You want that adhesive mesh to sit perfectly flush against the surface before you layer on the compound. If the mesh is peeling or uneven, you’re just setting yourself up for a bumpy finish that’ll show through your paint later. Once the compound is dry, take your time to sand drywall smooth after patching using a fine-grit sanding sponge. If you rush the sanding, you’ll spend more time trying to hide your mistakes than you would have spent doing it right the first time. Keep it level, keep it clean, and move on with your day.
Pro-Tips to Save You From a DIY Disaster
- Don’t rush the drying process. I know you want to see the finished wall immediately, but if you sand down wet spackle, you’re just creating a muddy mess that will eventually crack. Wait until it’s bone-dry.
- Sanding is where most people mess up. Use a fine-grit sanding sponge and work in light, circular motions. If you press too hard, you’ll sand away the surrounding paint and end up with a crater instead of a repair.
- Clean the dust before you paint. I can’t tell you how many times I’ve seen people paint directly over drywall dust. It won’t stick, and the finish will look like sandpaper. Grab a damp microfiber cloth and wipe the area clean first.
- Less is actually more. It’s much easier to apply a second, thin layer of compound than it is to try and scrape off a massive, thick glob that you applied in one go. Think thin layers, not one heavy coat.
- Match your texture. If your wall has a slight orange peel or knockdown texture, don’t leave your patch perfectly smooth. It’ll look like a literal thumbprint on your wall. Use a small sponge or a texture spray to blend the edges so the repair actually disappears.
Done and Dusted
At the end of the day, fixing that hole comes down to choosing the right tool for the job and having the patience to let things dry. Whether you opted for a quick patch kit to save time or went the full route with joint compound for a seamless finish, the goal was the same: removing a distraction from your environment. Remember, the secret isn’t in buying the most expensive gear; it’s about mastering the basics and ensuring your surfaces are smooth before you even think about touching a paintbrush. Once that patch is sanded down and the texture matches, that eyesore will be nothing more than a memory.
I know it can feel like just another chore on an endless to-do list, but there is a specific kind of mental clarity that comes from fixing what is broken instead of just working around it. When you stop ignoring the small cracks in your home, you stop letting the chaos of your surroundings dictate your mood. Don’t let a little bit of drywall dust intimidate you. Take the ten minutes, do the work, and reclaim your space. You’ve handled much harder things today than a hole in a wall, so go ahead and finish this—then go back to actually living your life.