I was standing in my kitchen last Tuesday, staring at a pile of expensive subway tiles and a half-empty bag of grout, feeling completely paralyzed by the sheer mess of it all. Most people will tell you that tiling is an art form reserved for professionals with specialized workshops, but that’s a lie that keeps too many of us stuck with outdated, stained walls. The truth is, learning how to tile a backsplash isn’t about having a master’s degree in masonry; it’s about having the right system and a few decent tools to manage the chaos. I’ve spent years refining my approach to DIY projects, and I’ve learned that if you don’t control the process, the process will definitely control you.
In this guide, I’m stripping away the fluff and the intimidating jargon to give you a streamlined, functional roadmap. I’ll show you exactly how to prep your surfaces, space your tiles without losing your mind, and clean up the mess so you can actually enjoy your new kitchen instead of dreading the cleanup. No hype, no unnecessary gear—just a clear, repeatable method to get the job done right.
Table of Contents
- Step-by-Step Instructions
- The Essential Tiling Tools List for Zero Stress Projects
- Mastering Measuring Kitchen Wall Area to Avoid Wasted Time
- 5 Pro-Tips to Keep Your Backsplash Project From Spiraling
- The Bottom Line: Systems Over Stress
- The Philosophy of a Clean Finish
- Finishing Strong
- Frequently Asked Questions
Guide Overview
Tools & Supplies
- Tile cutter or manual snapper for sizing tiles
- Notched trowel for spreading adhesive
- Rubber grout float for applying grout
- Spacers to maintain even gaps
- Backsplash tiles (area + 10% extra)
- Tile adhesive or mastic (1 tub/bag)
- Grout (1 bag)
- Tile sealant (1 bottle)
Step-by-Step Instructions
- 1. First, clear the decks. You can’t build a system on top of chaos, and you certainly can’t tile a wall covered in grease and crumbs. Scrub the backsplash area with a heavy-duty degreaser to ensure the surface is completely clinical. If there’s any residue left behind, your adhesive won’t bond, and you’ll be staring at falling tiles in six months. Once it’s dry, tape off your countertops and edges with painter’s tape to protect your existing finishes.
- 2. Map out your layout before you touch a single piece of tile. I always grab my notebook to sketch a quick grid. Don’t just start at one corner and hope for the best; that’s how you end up with a tiny, ugly sliver of tile at the far end. Instead, find the center point of your wall and work outward. This ensures your cuts are symmetrical and the finished product looks intentional, not accidental.
- 3. Prep your adhesive and start the application. I prefer using a pre-mixed thin-set or a high-quality mastic for smaller projects to keep things efficient. Use a notched trowel to spread the adhesive in small sections—only as much as you can actually cover in about ten minutes. You want the ridges to be uniform and consistent, much like the spacing on one of my vintage mechanical keyboards. If the ridges are too thick or uneven, your tiles will sit wonky.
- 4. Set the tiles with precision. Press each tile into the adhesive with a slight twisting motion to ensure full coverage. As you go, use your spacers—don’t skip this step. Spacers are the “systems” of the tiling world; they keep your grout lines straight and prevent the entire project from looking like a DIY disaster. Periodically step back and check your work against your center line to make sure you haven’t drifted.
- 5. Handle the cuts with a steady hand. You’re inevitably going to hit a corner or an outlet that requires a custom shape. Use a manual tile cutter for straight lines, but for those tricky L-shapes around electrical boxes, you’ll need a wet saw or a tile nipper. Take your time here. It’s better to measure twice and cut once than to waste a perfectly good tile because you were rushing to finish before dinner.
- 6. Let everything cure completely. This is the hardest part for people like me who want to see immediate results, but patience is a tool. Check the manufacturer’s instructions, but usually, you’ll want to wait at least 24 hours before applying grout. If you rush this, the weight of the grout or the moisture could shift the tiles out of alignment.
- 7. Grout the joints to seal the deal. Mix your grout to a peanut butter consistency and use a rubber grout float to push it deep into the spaces between the tiles. Work at an angle to ensure no voids are left behind. Once it sits for a bit, use a slightly damp sponge to wipe away the excess from the tile faces. Don’t use too much water, or you’ll wash the pigment right out of the grout. Once it’s clean and dry, you’re done.
The Essential Tiling Tools List for Zero Stress Projects
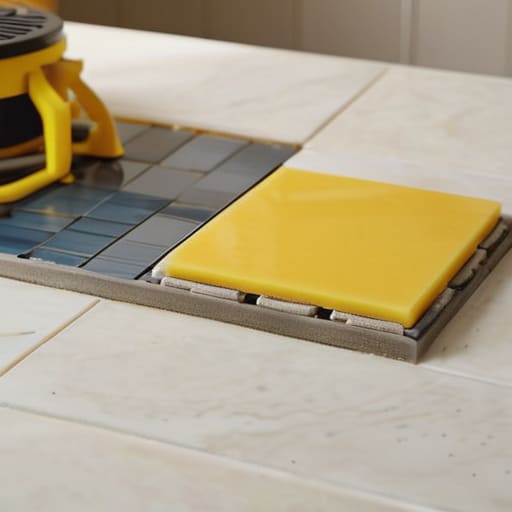
I’ve learned the hard way that a project is only as good as the gear you have ready before you even open the first box of tiles. There is nothing more frustrating than being halfway through a layout and realizing you’re missing a notched trowel or a level. When I’m putting together my essential tiling tools list, I prioritize precision over everything else. You’ll need a high-quality manual tile cutter, a bucket for mixing, a rubber grout float, and a large sponge. Most importantly, don’t skimp on your spacers; they are your best defense against preventing tile misalignment, which is the number one thing that makes a DIY job look amateur.
Beyond the heavy lifting, I always keep a small kit of “cleanup” supplies nearby. I find that having a dedicated microfiber cloth and a bucket of clean water ready makes a massive difference when it comes to cleaning grout after installation. If you try to scrub everything away with a single, dirty sponge, you’ll just end up smearing the haze back into the pores of the tile. Think of your tools as the system that keeps the chaos at bay—get them organized upfront, and the rest of the job will follow suit.
Mastering Measuring Kitchen Wall Area to Avoid Wasted Time
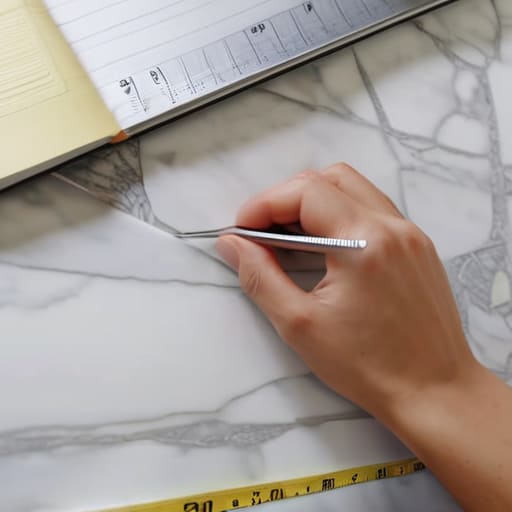
Before you even touch a single tile, you need to get your numbers right. I’ve learned the hard way that “eyeballing it” is a recipe for a mid-project crisis. When you’re measuring kitchen wall area, don’t just measure the length and height of the main space; you need to account for every outlet, light switch, and corner. I always grab my notebook and map out the perimeter, including any awkward gaps under cabinets or around plumbing. If you miss even an inch of a corner, you’ll end up staring at a gap that no amount of caulk can hide.
Once you have your dimensions, always add a 10-15% buffer to your total square footage. This isn’t just about having extras for mistakes; it’s about ensuring you have enough matching tiles from the same dye lot. Nothing kills my focus faster than running out of material halfway through and realizing the new batch looks slightly different. Getting this calculation right is the first step in preventing tile misalignment and ensuring the entire project feels intentional rather than rushed.
5 Pro-Tips to Keep Your Backsplash Project From Spiraling
- Don’t skip the dry layout. Before you even touch the thin-set, lay your tiles out on the counter to see how the pattern flows. It’s much easier to move a tile two inches to the left now than it is to try and fix a tiny, awkward sliver of tile in a corner once the glue is already drying.
- Protect your countertops like your life depends on it. Whether you’re working with granite or laminate, cover everything with heavy-duty builder’s paper or a thick drop cloth. Cleaning dried mortar off a stone countertop is a nightmare I wouldn’t wish on anyone, and I’d rather spend five minutes prepping than five hours scrubbing.
- Keep a bucket of clean water and a sponge within arm’s reach at all times. You need to wipe away excess grout or thin-set from the face of the tiles immediately. If that stuff cures on the surface, you’ll be fighting it with a scraper for the rest of the afternoon.
- Respect the drying time. It’s tempting to rush straight into grouting because you want to see the finished product, but if the thin-set hasn’t fully set, your tiles will shift and your hard work will literally slide down the wall. Patience is a tool, just like a level.
- Use spacers—and use them religiously. Even if you have a steady hand, manual spacing is a recipe for uneven lines that will drive you crazy every time you look at them. Consistency is the difference between a DIY job that looks “okay” and one that looks like it was done by a professional.
The Bottom Line: Systems Over Stress
Precision in the planning stage—specifically your measurements—is what prevents the mid-project panic of running out of tiles or realizing your layout is crooked.
Invest in the right tools once so you aren’t fighting your equipment; a clean cut with a good tile nipper beats a jagged, frustrating mess every single time.
Focus on small, repeatable steps rather than the finished product; if you manage the process one tile at a time, the result will take care of itself.
The Philosophy of a Clean Finish
“A backsplash isn’t just about the tiles you choose; it’s about the systems you put in place before the first layer of mortar hits the wall. If you respect the prep work and the precision of your measurements, the actual tiling becomes the easy part—the part where you actually get to see your vision come to life.”
Liam Anders Chen
Finishing Strong
At the end of the day, a successful backsplash comes down to the systems you put in place before the first tile even touches the wall. We’ve covered the groundwork: getting your measurements pinpoint accurate to avoid mid-project hardware store runs, gathering the right precision tools, and following a logical, step-by-step workflow. If you focus on the preparation and the process rather than just rushing to the finish line, you’ll find that the actual tiling is much more manageable. It’s about minimizing the variables that lead to frustration so that your workspace stays organized and your results stay clean.
I know that staring at a bare kitchen wall can feel overwhelming, but remember that every major project is just a series of small, repeatable tasks. Don’t let the fear of a single crooked tile stop you from taking ownership of your space. Once that grout is cured and you wipe away the excess, you won’t just see a new kitchen feature; you’ll see proof that you can tame the chaos of a home improvement project through simple, disciplined action. Now, grab your spacer, clear your mind, and get to work. You’ve got this.
Frequently Asked Questions
How much extra tile should I actually buy to account for cuts and accidental breaks?
Look, I’ve learned the hard way that running out of tile mid-project is a special kind of hell. It kills your momentum and forces a frantic trip to the store. Always add a 10% buffer for standard patterns. If you’re doing a complex herringbone or a diagonal layout, bump that up to 15%. That extra margin covers the inevitable miscuts and the occasional accidental crack, keeping your workflow smooth and your sanity intact.
Can I tile directly over my existing wall, or do I need to strip everything down to the studs first?
Look, I get the temptation to skip the demolition—it’s a mess and it’s exhausting. But here’s the pragmatic truth: if your current wall is flat, clean, and structurally sound, you can tile over it. However, if you’re dealing with peeling paint, grease buildup, or uneven surfaces, you need to strip it back. Don’t build a new system on a shaky foundation; if the base isn’t solid, your backsplash won’t be either.
What’s the best way to handle those tricky spots around electrical outlets without making a mess?
Outlets are the ultimate test of patience, but don’t wing it. The trick is to use a tile nipper for small adjustments and a diamond blade on your wet saw for the heavy lifting. Always measure twice and mark your cuts clearly with a pencil. Most importantly: turn off the power at the breaker first. I’ve learned the hard way that rushing through these “tricky spots” is exactly how you end up with a mess—or worse.