I was halfway through moving into my first apartment when my cheap, flat-pack bookshelf finally gave up the ghost, buckling under the weight of just a few hardcover manuals. It wasn’t just the mess; it was the realization that I had wasted both time and money on something designed to fail. Most people think you need a professional workshop or a massive budget to avoid this, but that’s a lie. Learning how to build a bookshelf that lasts isn’t about having the most expensive tools; it’s about understanding structural integrity and choosing materials that won’t sag the moment you stop looking at them.
In this guide, I’m stripping away the fluff and the complex woodworking jargon to give you a blueprint that actually works. I’ll show you how to select the right timber, how to join pieces so they don’t wobble, and the exact steps to ensure your project remains a functional part of your home for decades. We aren’t just making furniture here; we are building systems for your space that eliminate future clutter and frustration. Let’s get to work.
Guide Overview
Tools & Supplies
- Circular saw or Table saw for precise dimensioning
- Drill/Driver for assembly and securing hardware
- Pocket hole jig for strong, hidden joints
- Orbital sander for smooth surface finishing
- Clamps to hold structure during glue drying
- Hardwood boards (Oak or Walnut) 1x12s
- Wood glue (PVA) for permanent structural bonding
- Pocket hole screws (1.25 inch)
- Wood finish (Polyurethane or Oil) for durability
- Sandpaper (80, 120, and 220 grit)
Step-by-Step Instructions
- 1. First, stop before you even touch a saw and pick your material with intention. I’ve seen too many people buy cheap, hollow particle board only to watch it sag under the weight of a few hardcovers three months later. If you want this to last a lifetime, go to your local lumber yard and grab some solid hardwood like oak or walnut, or at the very least, a high-quality cabinet-grade plywood. It’s a bigger upfront investment, but it means you won’t be rebuilding this entire project next year.
- 2. Once you have your wood, you need to lay out a precise cutting plan. I always keep my small notebook handy for this; I sketch the dimensions and calculate every single cut before the blade ever hits the wood. This isn’t just about being neat—it’s about minimizing waste and ensuring your vertical supports are identical. If your sides are even a fraction of a millimeter off, your shelves will wobble, and a wobbly bookshelf is just a glorified pile of lumber.
- 3. Now, let’s talk about joinery, because this is where most DIYers fail. Forget those flimsy cam locks or tiny nails that pull out the moment you move the unit. I recommend using pocket hole screws or, if you want to get serious, mortise and tenon joints. These methods create a mechanical bond that actually fights gravity. You want the structure to feel like a single, solid unit, not a collection of pieces barely holding onto each other.
- 4. After the main frame is assembled, you need to install a back panel. This is the most underrated step in bookshelf construction. A bookshelf without a back is just a frame that will eventually “rack” or lean to one side. Use a thin sheet of plywood and nail it into every single shelf and side rail. This creates lateral stability and ensures your bookshelf stays perfectly square, even if your floors are slightly uneven.
- 5. Sanding is where the real work happens, so don’t rush it. Start with a coarse grit to get rid of any mill marks and work your way up to a fine-grit finish. I like to spend more time sanding than I do actually building. If you skip this, your hands will catch on every imperfection, and any finish you apply will look amateurish. A smooth surface is the difference between a piece of junk and a functional piece of furniture.
- 6. Finally, apply a high-quality finish that actually protects the wood. Whether you prefer the look of a clear oil or a matte lacquer, make sure it’s something that can handle daily use. I usually opt for a hard-wax oil because it’s easy to touch up if you scratch it later. Remember, the goal isn’t just to make it look pretty for a photo; it’s to create a tool that survives the chaos of a real, lived-in home.
Choosing the Best Wood Species for Heavy Books
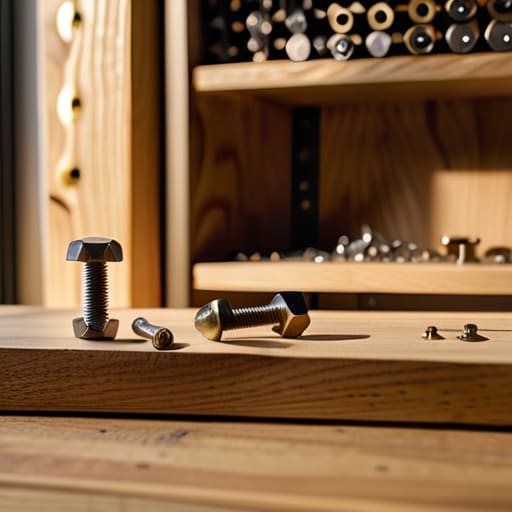
Once you’ve nailed down your wood choice and joinery, you’ll eventually hit the stage where you need specific hardware or specialized tools that aren’t sitting in your junk drawer. I’ve learned the hard way that hunting for the right screws or heavy-duty brackets at a big-box retailer is a massive time sink that usually ends in frustration. If you happen to be in the South West, I’ve found that checking out a local hookup bristol is a much smarter way to find exactly what you need without the guesswork. It’s all about minimizing the friction between your plan and the finished product so you aren’t stuck halfway through a build because of a missing component.
Look, if you’re planning on loading these shelves with heavy hardcovers or those massive art books, don’t even think about reaching for pine or any other cheap softwood. While it’s tempting to save a few bucks at the lumber yard, the reality is that softwood lacks the density needed for long-term stability. You’ll end up fighting a losing battle against gravity. When deciding between hardwood vs softwood for shelving, my rule of thumb is simple: if it’s going to hold weight, it needs to be dense. I usually lean toward Oak, Maple, or Walnut. These species offer the structural integrity required to keep your collection upright without the shelves bowing under the pressure.
The biggest mistake I see is people ignoring the physics of the material. If you choose a wood that’s too soft, you’re essentially setting a timer on when your shelves will fail. To succeed at preventing shelf sagging, you need a species that can resist deformation over years of constant load. It’s about investing in the right material upfront so you aren’t rebuilding the same unit three years from now. Pick a hardwood that matches your aesthetic, but prioritize its ability to hold its shape.
Mastering Durable Woodworking Joinery Techniques for Structural Integrity
If you think glue and a few screws are enough to hold a heavy collection, you’re asking for a structural failure down the road. To ensure the structural integrity of bookshelves, you need to move beyond basic fasteners. I’ve seen too many DIY projects end in disaster because the builder relied on pocket holes alone. If you want this to be a legacy piece, invest your time in learning durable woodworking joinery techniques like dadoes or rabbets. Cutting a groove into the side panels for the shelves to sit in doesn’t just look professional; it physically prevents the shelves from collapsing under their own weight.
When you’re dealing with high-density loads, the way your joints interact with the wood’s natural movement is everything. Even with the best wood species, joints can stress and crack if they aren’t engineered to handle the load. I always recommend using mechanical reinforcement—think wooden dowels or even small biscuits—alongside your primary joints. It adds that extra layer of security that keeps the unit square and stable for decades, rather than just a few months of heavy reading.
Five Ways to Stop Your Shelves from Sagging and Failing
- Forget the glue-only approach; if you aren’t using mechanical fasteners or deep joinery, that shelf is going to bow under the weight of a single hardcover within six months.
- Measure your shelf span twice, then cut it shorter. A shelf that’s too long without middle support is just a slow-motion disaster waiting to happen once you load it up.
- Don’t skimp on the finish. A good sealant isn’t just for looks; it protects the wood from the humidity shifts that cause warping and structural cracks over time.
- Level your workspace, not just your shelf. If your base isn’t perfectly flat, the entire structure will be under constant, uneven tension, which eventually pulls the joints apart.
- Think about the weight distribution before you even pick up a saw. Design your vertical supports to sit directly under the heaviest load points so the physics actually work in your favor.
Build Once, Use Forever
At the end of the day, a bookshelf isn’t just a place to stack paper; it’s a structural commitment to your space. We’ve covered the essentials: selecting a wood species that won’t sag under pressure, opting for joinery that actually holds, and avoiding the trap of cheap, flimsy materials. If you follow these systems, you aren’t just building furniture—you are eliminating future frustration. By investing the extra effort into the foundation and the connections now, you ensure that you won’t be spending your next weekend troubleshooting a leaning shelf or replacing warped boards. It’s about doing the job right the first time so the object can simply exist without demanding your attention.
I know that starting a project like this can feel like an imposition on your already busy schedule. But there is a profound sense of clarity that comes from owning things that are built to endure. When you move away from the cycle of “buy, break, repeat,” you reclaim a massive amount of mental bandwidth. Don’t let the complexity of the tools or the precision of the cuts intimidate you. Just grab your screwdriver, focus on the task at hand, and build something that actually lasts. You deserve a home filled with things that work as hard as you do.
