It was 2:00 AM, and that rhythmic tink, tink, tink of a dripping kitchen tap was doing more than just wasting water; it was eroding my sanity. I sat there in the dark, staring at the sink, feeling that familiar surge of frustration because I knew I didn’t have the time to call a plumber and wait three days for a service window. Most people think you need a degree in plumbing or a massive toolkit to handle this, but that’s a lie that keeps us stuck in a cycle of minor chaos. Learning how to fix a leaky faucet isn’t about complex engineering; it’s about having the right small tools and a systematic approach to stop the noise.
I’m not here to give you a twenty-page manual filled with technical jargon that leaves you more confused than when you started. Instead, I’m going to show you exactly how to strip this problem down to its core components and solve it efficiently. We’re going to walk through the precise steps to identify the culprit—whether it’s a worn-out washer or a faulty cartridge—so you can reclaim your quiet home and your peace of mind. Let’s get this done quickly so you can get back to your actual life.
Table of Contents
- Step-by-Step Instructions
- Identify the Common Causes of Leaking Faucets Fast
- Essential Plumbing Tools for Faucet Repair Without the Chaos
- Five Pro-Tips to Keep Your Repair Clean and Efficient
- The Bottom Line: Stop the Drip, Save Your Sanity
- ## The Philosophy of Maintenance
- Reclaim Your Time and Your Sink
- Frequently Asked Questions
Guide Overview
Tools & Supplies
- Adjustable wrench for loosening nuts
- Screwdriver (Phillips and flathead) for removing handles
- Allen wrench for hex-head screws
- Replacement washer or O-ring (set of various sizes)
- Plumber's grease (small tube)
Step-by-Step Instructions
- 1. Before you even touch a wrench, you need to shut off the water supply. Look under the sink for the oval-shaped shut-off valves and turn them clockwise until they stop. If your sink doesn’t have local valves, you’ll have to head to the main water line for the house. I always double-check this by turning the faucet on to make sure the pressure has actually dropped to zero before I start taking things apart.
- 2. Clear out the workspace and plug the drain. This is a small step that saves a massive headache later. Grab a towel or a sink stopper and plug the drain immediately. There is nothing more frustrating than watching a tiny, essential screw slide down the pipes and disappear into the dark. I keep a small magnetic tray in my bag for exactly this reason—it’s the best way to keep your hardware from becoming part of the plumbing.
- 3. Remove the handle to access the internal components. Most modern faucets have a small decorative cap on top that you can pop off with your precision screwdriver to reveal a screw. Once that screw is out, pull the handle straight up. If it feels stuck due to mineral buildup, don’t force it; give it a gentle wiggle or use a bit of white vinegar to dissolve the crustiness before you try again.
- 4. Take out the cartridge or the stem. Depending on your faucet type, you’ll likely see a brass or plastic cartridge held in place by a retaining nut. Use your adjustable wrench to unscrew that nut, being careful not to apply excessive force that might crack the housing. Once the nut is loose, pull the cartridge out vertically. If it’s being stubborn, a little steady pressure is all you need.
- 5. Inspect and replace the faulty parts. This is where the actual “fix” happens. Usually, the culprit is a worn-out O-ring or a degraded rubber washer. Take the old parts with you to the hardware store to ensure you get an exact match. I’ve learned the hard way that being “close enough” with a washer is a recipe for a leak that returns in three days.
- 6. Reassemble the faucet in the exact reverse order of how you took it apart. Slide the new cartridge into place, tighten the retaining nut, and screw the handle back on. As you tighten everything, aim for firm but not aggressive. You want a solid seal, but you don’t want to strip the threads or crush the new rubber components.
- 7. Test your work and check for leaks. Slowly turn the water supply valves back on—don’t just blast them open—and watch the faucet closely. Turn the tap on and off a few times to clear any trapped air from the lines. If you don’t see a single drop escaping from the handle or the spout, you’re done. Now, get back to whatever you were actually planning to do today.
Identify the Common Causes of Leaking Faucets Fast
Before you dive into the repair, you need to know what you’re actually fighting. Most people assume a leak means the whole fixture is shot, but that’s rarely the case. Usually, you’re looking at one of a few common causes of leaking faucets. If you have an older style where you turn the handle several times to get water flowing, you’re likely dealing with a worn-out seal. In those scenarios, the goal is often to replace faucet washer components that have simply degraded from years of friction.
If your faucet has a single lever that you tilt or rotate, you’re likely working with a cartridge system. Here, the issue isn’t a simple rubber ring, but rather the internal mechanism itself. Knowing whether you need to perform specific cartridge faucet replacement steps or just tighten a retaining nut can save you a massive amount of frustration and an extra trip to the hardware store. I always keep a small checklist in my notebook for these things; identifying the specific type of valve before you even grab your plumbing tools for faucet repair is the difference between a twenty-minute fix and a wasted Saturday afternoon.
Essential Plumbing Tools for Faucet Repair Without the Chaos
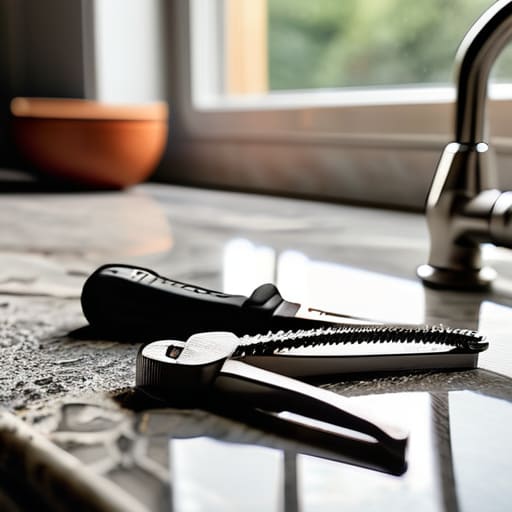
Before you dive into the actual repair, you need to clear the mental and physical clutter. There is nothing more frustrating than being halfway through a job only to realize you’re missing a specific hex key or a specialized wrench. To avoid that mid-project chaos, I always lay out my plumbing tools for faucet repair on a clean towel before I even touch the sink. You’ll want a reliable adjustable wrench, a set of screwdrivers, and most importantly, a pair of needle-nose pliers. Having these organized and within reach means you won’t be hunting through a junk drawer while water is actively pooling on your counter.
Beyond the basics, keep a small container handy for the tiny screws and washers you’ll inevitably remove. If you’re dealing with a specific issue like fixing compression faucet leaks, you might also need a bit of plumber’s grease to ensure everything seats correctly. I’ve learned the hard way that trying to “make do” with the wrong tool usually leads to stripped screws or scratched finishes. Treat your toolkit with respect, and it will make the entire process feel less like a struggle and more like a simple, controlled task.
Five Pro-Tips to Keep Your Repair Clean and Efficient
- Shut off the water supply before you even touch a screwdriver; there is nothing more frustrating than a sudden spray of water turning a quick fix into a chaotic mess.
- Lay a towel over the sink drain to catch small screws or washers, because losing a tiny component down the drain is a massive waste of time you’ll never get back.
- Take photos of every single part as you disassemble the faucet so you aren’t left staring at a pile of hardware wondering how it all fits back together.
- Don’t just replace the part that looks broken; if you’re opening it up, check the O-rings and gaskets for wear while you’re already in there to prevent a second repair next week.
- Clean the internal components with a bit of white vinegar to remove mineral buildup, ensuring your new parts actually seat properly and create a perfect seal.
The Bottom Line: Stop the Drip, Save Your Sanity
Don’t let a minor leak turn into a major headache; identifying the specific cause—whether it’s a worn washer or a faulty cartridge—is half the battle.
Keep your toolkit lean and functional; you don’t need a professional plumber’s van, just a few precision tools and the right approach to get the job done right.
Treat this as a quick system reset for your home—fix it once, do it properly, and get back to the things that actually matter in your day.
## The Philosophy of Maintenance
“A dripping faucet isn’t just a plumbing issue; it’s a constant, rhythmic drain on your mental clarity. Fixing it isn’t about being a handyman—it’s about reclaiming your environment from the small frictions that steal your focus.”
Liam Anders Chen
Reclaim Your Time and Your Sink
At the end of the day, fixing that leak wasn’t just about stopping a drip; it was about applying a bit of logic to a small piece of chaos. By identifying whether the culprit was a worn-out O-ring or a faulty cartridge, and having the right tools ready to go, you’ve successfully prevented a minor nuisance from turning into a costly plumbing emergency. You’ve tightened your system, saved some money, and most importantly, you’ve eliminated that constant, rhythmic distraction that was eating away at your focus. Now that the hardware is sound, you can check this off your list and move on to something more meaningful.
I’ve learned through years of managing operations that the most efficient way to live is to tackle the small disruptions before they snowball into overwhelming problems. Don’t let a single broken component dictate the flow of your day or drain your mental energy. When you take control of these small, tangible repairs, you’re actually practicing a form of intentional living. You are deciding that your environment should serve you, not the other way around. Fix the leak, clear the clutter, and get back to the work—and the life—that actually matters.
Frequently Asked Questions
Should I replace the entire faucet assembly, or is it actually worth the effort to just swap out the internal parts?
Look, I’m a big believer in fixing what’s broken rather than just throwing it away, but you have to be pragmatic. If it’s just a worn-out washer or a faulty cartridge, swap the parts. It’s cheap, fast, and keeps unnecessary waste out of your life. However, if the actual metal body is corroded or the handle feels loose and cheap, don’t waste your Saturday fighting a losing battle. Just replace the whole unit and move on.
I’ve tightened everything but it’s still dripping; did I miss a specific seal or washer that’s likely the culprit?
If you’ve tightened everything and that drip is still mocking you, you’ve likely hit the core of the problem: a worn-out seal. Most often, it’s a degraded O-ring or a flattened rubber washer that just can’t maintain a watertight barrier anymore. Even if the hardware feels tight, a microscopic gap in a perished seal is enough to keep the water flowing. Grab your screwdriver, pull the cartridge or stem, and let’s swap those old seals out.
How do I know if my faucet is a compression type or a cartridge type before I start taking things apart?
Before you start tearing things apart, look at the handles. If you have two separate knobs that you have to turn several times to fully open or close, you’re likely dealing with a compression faucet. They rely on a screw mechanism to press a washer against a seat. If you have a single lever that moves up/down or side-to-side, it’s almost certainly a cartridge or ball valve. Check the movement; smoothness usually means cartridge.
