I was staring at a completely blank, white wall in my apartment last Tuesday, feeling that familiar surge of decision fatigue. Most people think you need an expensive art degree or a massive budget to fix a sterile room, but that’s a total myth. The truth is, the biggest barrier to actually enjoying your space isn’t a lack of talent; it’s the overwhelming amount of clutter and “stuff” we think we need to buy. I spent way too many hours scrolling through overpriced decor sites before I realized that learning how to make wall art is actually about stripping away the noise and focusing on a few intentional, high-impact pieces that actually mean something to you.
In this guide, I’m cutting through the fluff to show you a streamlined, systems-based approach to DIY decor. I won’t bore you with complex techniques that require a studio setup; instead, I’ll show you how to use simple materials to create professional-looking results without the usual chaos. We’re going to focus on efficient workflows and minimal tools so you can stop overthinking your interior design and finally get your walls looking exactly how you want them.
Table of Contents
- Step-by-Step Instructions
- Master Easy Canvas Painting Techniques Without the Mess
- Simple Textured Wall Art Methods for Instant Impact
- 5 Ways to Keep Your Project from Turning into a Mess
- The Bottom Line: Keep It Simple, Keep It Moving
- The Philosophy of a Finished Project
- Stop Planning and Start Creating
- Frequently Asked Questions
Guide Overview
Tools & Supplies
- Paintbrushes (various sizes for application)
- Palette knife (for texture effects)
- Pencil (for sketching designs)
- Canvas (1 piece, medium size)
- Acrylic paint (set of multiple colors)
- Gesso (1 jar, for priming)
- Painter's tape (1 roll, for geometric patterns)
Step-by-Step Instructions
- 1. First, clear your workspace. I can’t stress this enough—you can’t build something clean if you’re working on a desk covered in old mail and coffee rings. Grab a flat surface, sweep off the clutter, and lay down some newspaper or a drop cloth so you aren’t scrubbing paint out of your wood grain later.
- 2. Pick your medium based on your actual skill level, not what you saw on a Pinterest board. If you want something low-maintenance, go with minimalist line art using a black marker on heavy cardstock, or try a textured canvas with plaster. The goal here is to create something that looks intentional, not something that looks like a frantic craft project gone wrong.
- 3. Gather your tools and keep them within arm’s reach. I always keep a small kit ready, but for this, you’ll need your chosen medium, high-quality adhesive or mounting strips, and a level. Don’t get halfway through a project only to realize you’re hunting for a ruler; prepare your kit first so you can maintain your momentum.
- 4. Map out your layout before you commit to any permanent changes. If you’re working with multiple pieces, lay them out on the floor exactly how you want them to look on the wall. This is where you fine-tune the spacing to ensure the visual weight feels balanced and doesn’t overwhelm the room.
- 5. Execute the actual creation with a focus on precision. If you’re painting, use steady, deliberate strokes; if you’re assembling a collage, ensure your edges are crisp. I find that working in short, focused bursts prevents the “perfectionist paralysis” that usually leads to a messy finished product.
- 6. Test the placement on the wall using painter’s tape. I never trust my eyes alone when it comes to height; I use a level to make sure everything is perfectly straight. Tape your pieces up, step back, and look at the whole setup from across the room to see if it actually fits the vibe of your space.
- 7. Secure the art and clean up immediately. Once you’re happy with the layout, swap the tape for your permanent mounting hardware or command strips. As soon as the art is up, put your tools away and wipe down your workspace. A clean environment is the final step in a successful system.
Master Easy Canvas Painting Techniques Without the Mess
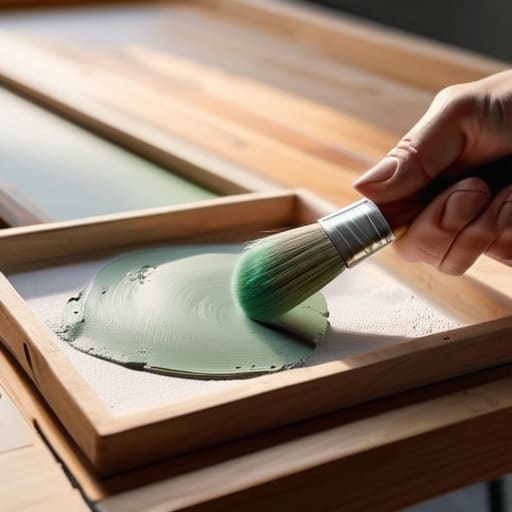
If you’re worried about making a disaster of your living room, let’s simplify things. You don’t need a studio setup to get decent results; you just need a system to control the chaos. I’ve found that the best easy canvas painting techniques rely more on preparation than raw talent. Instead of diving straight into the paint, start by laying down a base layer of primer or a single muted color. This prevents the canvas from “drinking” your expensive pigments and gives you a consistent surface to work on.
To keep things clean, I always keep a damp rag and a small tray of water within arm’s reach. If you want to experiment with textured wall art methods—which I highly recommend for adding depth without needing precision—try mixing a bit of modeling paste or even joint compound into your acrylics. It adds a tactile, high-end feel that makes your work look intentional rather than accidental. Just remember: work in layers. It’s much easier to fix a mistake on a dry layer than to fight a muddy, wet mess.
Simple Textured Wall Art Methods for Instant Impact
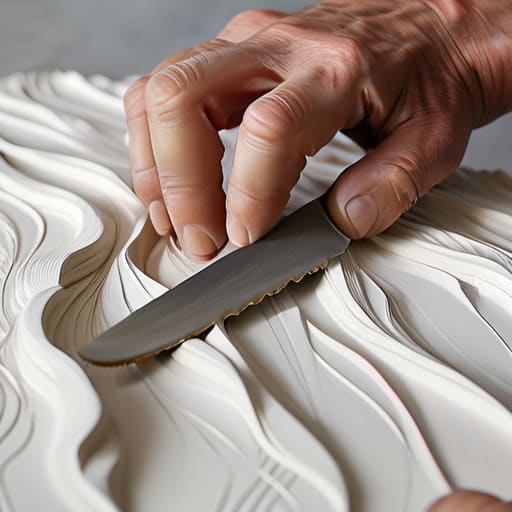
If you want to move beyond flat colors and actually add some depth to your space, you need to experiment with textured wall art methods. I’ve found that the easiest way to do this without spending a fortune is by using joint compound or even thick modeling paste. Instead of trying to paint a perfect picture, grab a putty knife or even an old credit card and just smear the material across your canvas in sweeping, intentional motions. It’s much more forgiving than traditional brushwork; if you mess up, you just scrape it off and start again.
This is one of those budget friendly home decor projects that looks incredibly high-end once it’s dry. Once the texture sets, you can leave it raw for a minimalist, sculptural look, or lightly brush a bit of diluted acrylic over the ridges to catch the light. I personally prefer the “less is more” approach—don’t feel like you have to cover every inch. A few well-placed, heavy ridges can create a focal point that makes your entire room feel more curated and less cluttered.
5 Ways to Keep Your Project from Turning into a Mess
- Prep your workspace before you even touch a brush. Clear a flat surface, lay down some old newspapers or a cheap drop cloth, and make sure you have enough room to move. If you’re hunting for a rag halfway through, you’ve already lost your momentum.
- Stick to a limited color palette. One of the biggest mistakes I see is people grabbing every tube of paint they own, only to end up with a muddy, chaotic mess. Pick three or four complementary colors and work within those bounds to keep the look intentional.
- Don’t overthink the “art” part. If you’re feeling stuck, focus on texture or shape rather than trying to paint a masterpiece. Sometimes a simple, repetitive pattern or a heavy layer of plaster looks more sophisticated than a failed attempt at realism.
- Invest in a few decent tools, not a whole kit. You don’t need fifty brushes; you need two good ones that hold their shape and a palette knife that won’t bend. Quality tools save you the frustration of fighting your equipment.
- Plan your lighting before you hang anything. A piece of art can look incredible in your workspace but completely flat once it hits your living room wall. Check how the shadows fall in your actual space so you aren’t surprised by the result later.
The Bottom Line: Keep It Simple, Keep It Moving
Don’t let the fear of a blank canvas paralyze you; pick a technique that fits your space and just start—perfection is the enemy of a finished project.
Prep your workspace before you touch a single brush or tool so you aren’t cleaning up a mess halfway through your creative flow.
Focus on texture and scale rather than intricate details to get a high-end look without needing a degree in fine arts.
The Philosophy of a Finished Project
“Wall art shouldn’t be another source of clutter or a weekend-long headache; it’s about choosing a simple, repeatable process that turns a blank space into something meaningful without letting the mess take over your life.”
Liam Anders Chen
Stop Planning and Start Creating
At the end of the day, making your own wall art isn’t about achieving museum-grade perfection; it’s about building a space that actually feels like yours. We’ve covered everything from keeping your canvas painting sessions clean to using simple textures to add depth without needing a degree in fine arts. Whether you choose a minimalist approach or something a bit more tactile, the goal is to remove the friction between your idea and the final product. Don’t let the fear of a messy workspace or a “bad” first attempt keep you stuck in the planning phase. Just grab your supplies, clear a small corner of your desk, and get the first layer down.
I’ve spent a lot of my life trying to optimize every minute, but I’ve learned that some of the best ways to reclaim your mental clarity come from the simple, tactile act of making something with your hands. Your home shouldn’t be a showroom of mass-produced items that mean nothing to you; it should be a reflection of your own rhythm and personality. Don’t overthink the process or worry about whether it fits a specific trend. Just focus on the small wins—the satisfaction of a clean line or a well-placed texture. Build your environment one piece at a time, and make it yours.
Frequently Asked Questions
I don't have a dedicated studio space; how can I make this without turning my entire living room into a mess?
Look, I get it. I live in a city apartment; I don’t have a spare room to turn into a disaster zone either. The trick is treating your workspace like a modular system. Use a large silicone mat or even an old shower curtain liner to catch the spills. Keep your supplies in a single, portable bin. When you’re done, you wipe the mat, tuck the bin away, and your living room is back to being a living room.
How do I figure out what size or style of art actually fits my walls without it looking cluttered or out of place?
Stop guessing and start measuring. Before you buy anything, grab that notebook I always carry and map it out. Use painter’s tape to outline the dimensions of potential pieces directly on your wall. This lets you see the scale in real-time without the commitment. For style, stick to a cohesive palette—if your room is minimalist, don’t clutter it with mismatched frames. Aim for one focal point rather than a dozen tiny distractions.
What are some budget-friendly ways to make these pieces look high-end rather than like a DIY project gone wrong?
The secret to making DIY art look intentional rather than accidental is all in the finishing. First, ditch the cheap plastic frames; even a basic wooden frame from a thrift store, sanded down and stained, changes everything. Second, pay attention to the edges. If your canvas shows raw, messy sides, wrap them in matching paper or paint them a solid neutral. A clean, cohesive presentation is what separates a “craft project” from a curated piece.
