I was standing in my kitchen last Sunday, staring at a mountain of vegetable scraps and feeling that familiar, nagging sense of inefficiency. Most people think you need a high-tech, expensive rotating tumbler or a massive, complex setup to start composting, but that’s just unnecessary friction. I spent way too much time in my early twenties over-engineering every single project I touched, only to realize that complexity is the enemy of consistency. If you want to learn how to make a compost bin that actually works without turning your backyard into a second job, you have to stop looking for the most sophisticated solution and start looking for the most functional one.
In this guide, I’m stripping away the fluff and the expensive gardening jargon to show you a streamlined approach. I’ll walk you through a simple, durable build that fits into a busy schedule and won’t require a degree in biology to maintain. You aren’t going to find any “magic” secrets here—just a straightforward, systems-based method to turn your waste into something useful. Let’s get your system running so you can stop managing trash and start growing something better.
Table of Contents
- Step-by-Step Instructions
- Choosing Best Materials for Backyard Composting Without the Fuss
- Smart Compost Bin Dimensions and Design for Maximum Efficiency
- 5 Small Adjustments to Keep Your Compost from Becoming a Chore
- The Bottom Line
- ## The Philosophy of the Bin
- Getting Started with Less Friction
- Frequently Asked Questions
Guide Overview
Tools & Supplies
- Drill with bits for making aeration holes
- Handsaw or shears for trimming materials
- Measuring tape for sizing components
- Plastic storage bin (18-30 gallons)
- Drill bits (small for ventilation)
- Hardware cloth or mesh (optional for base)
- Screws or fasteners (if using a lid)
Step-by-Step Instructions
- 1. First, pick your spot. Don’t go looking for a perfect, manicured corner of the yard; you just need a flat, well-drained area that gets a bit of sun but isn’t right against your house. I always say, if it’s too hard to access, you’re eventually going to stop using it, and then you’re just back to throwing scraps in the trash.
- 2. Grab your materials. You don’t need a fancy kit from a garden center. I prefer using repurposed wooden pallets because they’re free (or dirt cheap) and the gaps between the slats provide the perfect amount of airflow. If you can’t find pallets, a simple plastic bin with holes drilled into the sides works too, but pallets are the gold standard for efficiency.
- 3. Build the frame. If you’re using pallets, stand three of them up to form a “U” shape and secure them at the corners using heavy-duty zip ties or some basic screws from my kit. It doesn’t have to look like a piece of fine furniture; it just needs to be structurally sound enough to hold a heavy pile of organic matter without collapsing on your toes.
- 4. Layer your “browns” and “greens.” This is where most people mess up by overthinking the science. You want a base layer of coarse material like small twigs to help with drainage, then alternate between “browns” (dried leaves, shredded cardboard, or straw) and “greens” (vegetable scraps, coffee grounds, or fresh grass clippings). Think of it like a layer cake of decomposition.
- 5. Keep it moist, not soaked. Your compost pile should feel like a wrung-out sponge. If it’s bone dry, the microbes won’t work; if it’s a swamp, it’ll smell, and nobody wants that. I usually check the moisture level once a week—if it looks dusty, give it a quick spray with the hose.
- 6. Turn the pile. Every couple of weeks, grab a pitchfork and give the whole mess a good stir. This introduces oxygen into the center of the pile, which is the secret engine that speeds up the entire process. It’s a bit of manual labor, but it’s a small price to pay for high-quality soil.
- 7. Harvest your black gold. Once the material at the bottom looks dark, crumbly, and smells like a fresh forest floor, you’re done. Sift out any large chunks that haven’t broken down yet, toss them back into the new pile, and use the rest to feed your plants. It’s a closed loop that actually works.
Choosing Best Materials for Backyard Composting Without the Fuss
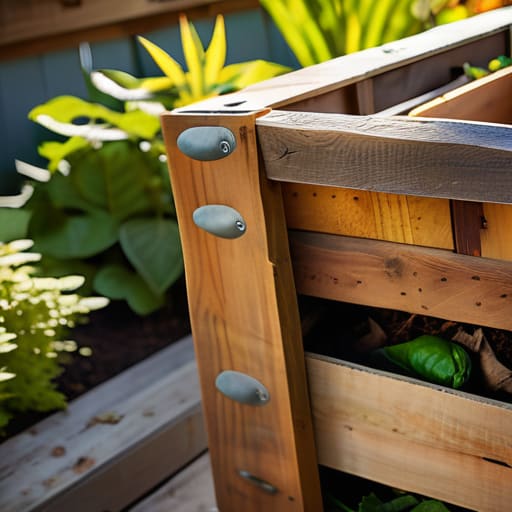
Don’t get paralyzed by the endless options at the hardware store. When I’m looking at best materials for backyard composting, I apply the same logic I use for my mechanical keyboards: prioritize durability and function over aesthetics. If you’re building something permanent, cedar is my go-to because it resists rot without needing toxic chemical treatments. If you just want to test the waters, reclaimed wooden pallets are essentially free and get the job done. The goal isn’t to build a masterpiece; it’s to create a vessel that holds heat and manages moisture without constant intervention.
Once you’ve picked your structure, keep your eye on the organic waste decomposition process. You don’t need a high-tech laboratory setup to succeed. Whether you’re sticking to a standard pile or exploring a more compact vermicomposting setup for a smaller space, the principle remains the same: balance. You need a mix of “greens” for nitrogen and “browns” for carbon. If you skip the structural basics, you’ll end up with a soggy, smelly mess that feels like a chore rather than a system. Keep it simple, keep it breathable, and move on with your day.
Smart Compost Bin Dimensions and Design for Maximum Efficiency

When you’re designing your bin, don’t just build something that looks good—build something that actually works. I’ve learned the hard way that if your bin is too small, you won’t generate enough heat to actually speed up the organic waste decomposition process. Aim for a volume of at least 3 feet cubed. This is the “sweet spot” where the pile can retain enough internal temperature to break down effectively without becoming a stagnant, smelly mess.
Size is only half the battle, though; you have to think about airflow. If you’re building a closed wooden structure, you need to integrate specific aeration methods for compost, like drilling 1/2-inch holes along the sides or leaving gaps between slats. Without oxygen, your pile turns anaerobic, and that’s when you get those unpleasant odors that drive the neighbors crazy. I always tell people: treat your bin like a small-scale engine. It needs the right fuel-to-air ratio to run smoothly. Keep it compact enough to manage easily, but large enough to actually do the heavy lifting for you.
5 Small Adjustments to Keep Your Compost from Becoming a Chore
- Location is everything; don’t tuck your bin in a far corner where you’ll forget it exists, but keep it far enough from the patio that you aren’t dealing with flies during a dinner party.
- Manage your moisture like you manage your workspace—it should feel like a wrung-out sponge, not a swamp and certainly not a desert.
- Balance your browns and greens early on so you aren’t playing catch-up later with a smelly, nitrogen-heavy mess that’s impossible to break down.
- Airflow is your best friend, so don’t skimp on the ventilation holes; a compost pile that can’t breathe is just a pile of rotting trash.
- Keep a small, dedicated bin in your kitchen to collect scraps throughout the day, otherwise, you’ll find yourself making unnecessary trips to the backyard every time you peel a carrot.
The Bottom Line
Don’t get paralyzed by perfection; a simple, functional bin made from basic materials works just as well as an expensive store-bought one.
Focus on the ratio of greens to browns to keep the system running smoothly so you aren’t stuck troubleshooting a smelly mess later.
Build for your actual space and needs, not for an idealized garden, so the maintenance becomes a quick habit rather than a weekend chore.
## The Philosophy of the Bin
“Don’t get caught in the trap of trying to build a perfect, high-tech composting system. A compost bin isn’t a centerpiece; it’s a tool. If it holds the scraps and manages the heat, it’s doing its job. Build it simple, build it sturdy, and then get out of its way so you can get back to your actual life.”
Liam Anders Chen
Getting Started with Less Friction
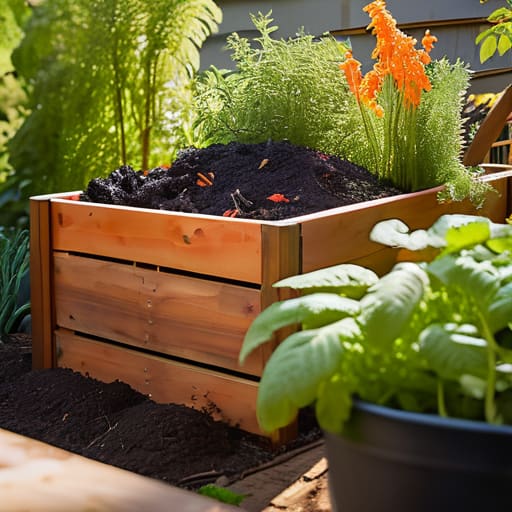
At the end of the day, you don’t need a high-tech, expensive setup to turn your kitchen scraps into something useful. We’ve covered the essentials: picking durable, cost-effective materials, sizing your bin so it actually works for your space, and keeping the design simple enough that it doesn’t become another chore on your to-do list. The goal isn’t to build a masterpiece; it’s to create a functional system that manages waste without demanding all your attention. Once you have the right dimensions and the right materials in place, the biology does most of the heavy lifting for you.
Don’t let the fear of doing it “wrong” keep you from starting. Perfectionism is just another form of procrastination, and in my experience, the best way to learn is to just build it and see how it performs in your own backyard. You’ll tweak it, you’ll adjust the airflow, and eventually, it will become a seamless part of your routine. Stop letting organic waste take up space in your bin and start turning it into something that fuels your garden. You’ve got the plan; now go grab your tools and make it happen.
Frequently Asked Questions
How do I stop the bin from smelling like a landfill if I don't get the balance right?
If your bin starts smelling like a landfill, you’ve likely got too much moisture or too many “greens”—those nitrogen-heavy kitchen scraps. It’s a simple chemistry problem. To fix it, stop adding food scraps for a few days and mix in a heavy dose of “browns.” I’m talking shredded cardboard, dry leaves, or even old newspaper. This balances the nitrogen and restores airflow. Think of it as recalibrating a system: more carbon, more air, less funk.
Will this setup actually attract pests like rats or raccoons to my yard?
Look, I get it. The thought of a raccoon raiding your backyard is enough to make anyone reconsider. If you just throw scraps into an open pile, yeah, you’re basically hosting a buffet for local wildlife. But it’s all about the system. Use a bin with a secure lid and keep your “greens”—the food scraps—buried deep under “browns” like dried leaves. If you manage the moisture and keep it covered, you’ll keep the pests out.
Do I really need to turn the pile every week, or can I just let it sit?
Look, if you’re looking for a “set it and forget it” solution, you can let it sit, but don’t expect much. Without turning it, you’re basically just making a slow-motion pile of trash that eventually smells. If you want actual, usable compost in a reasonable timeframe, give it a quick turn every week or two. It introduces oxygen, which is the fuel for the process. Think of it as a small maintenance task to save big time later.
