I was staring at my coffee table last Saturday, surrounded by half-empty cans of cheap enamel and a fine mist of overspray that had settled on my floor like toxic snow. I had spent three hours trying to fix a single wooden surface, only to end up with a finish that looked more like orange peel than a professional coat. Most people think that learning how to spray paint is just about pulling a trigger and moving your hand, but that’s exactly how you end up wasting an entire afternoon and a perfectly good piece of furniture. The truth is, spray painting isn’t an art project; it’s a system of preparation and motion.
I’m not here to give you a lecture on color theory or fancy professional techniques that require a studio setup. My goal is to show you the most efficient, repeatable way to get a factory-smooth finish without the chaos. I’ll walk you through the exact prep steps I use to keep my workspace clean, the precise distance you need to maintain to avoid drips, and how to time your passes so you can get it done right the first time. Let’s strip away the mess and get to work.
Table of Contents
- Step-by-Step Instructions
- Skip the Mess Essential Spray Paint Surface Preparation
- The Pro Secret to Achieving a Smooth Finish Every Time
- Five Mistakes That’ll Ruin Your Weekend (And How to Avoid Them)
- The Bottom Line: Don't Overcomplicate the Process
- The Philosophy of the Finish
- Final Thoughts Before You Start
- Frequently Asked Questions
Guide Overview
Tools & Supplies
- Spray paint can and nozzle for applying color
- Drop cloth or newspaper to protect surfaces
- Sandpaper for smoothing the surface
- Surface cleaner or degreaser (1 bottle)
- Spray paint (1-3 cans depending on size)
- Painter's tape for masking edges
Step-by-Step Instructions
- 1. First, you need to clear your workspace and prep the surface. I’ve learned the hard way that trying to spray paint in a cluttered corner is a recipe for a ruined project. Find a well-ventilated area—ideally outdoors—and lay down some old newspapers or a drop cloth. Once you’re set, scrub the object you’re painting with warm soapy water to remove any grease or dust. If you skip this, the paint won’t actually bond to the surface, and you’ll be peeling it off in a month.
- 2. Sanding is where most people get lazy, but it’s the most critical step for a professional finish. Take a medium-grit sandpaper and lightly scuff the entire surface. You aren’t trying to grind the material down; you just want to remove the shine so the new layer has something to grip. After sanding, wipe it down one last time with a tack cloth or a slightly damp microfiber rag to ensure there isn’t a single speck of dust left behind.
- 3. Masking is your best friend if you want to avoid a headache later. If there are parts of the object that shouldn’t be painted—like hinges, handles, or delicate engravings—cover them tightly with painter’s tape. I always keep a roll of high-quality tape in my bag because cheap stuff leaves a sticky residue that’s a nightmare to clean up. Precision here saves you from spending an hour trying to scrape paint off edges later.
- 4. Now, grab your can and give it a thorough shake. This sounds basic, but if the pigments aren’t fully mixed, you’ll end up with splotches and uneven colors. Shake it for at least a full minute. When you’re ready to spray, hold the can about 8 to 12 inches away from the object. Start your spray off to the side of the item, sweep across in a steady motion, and stop once you’ve passed the other side. This prevents that dreaded “pooling” effect in the center.
- 5. Forget the urge to cover everything in one heavy coat. That is the fastest way to get drips, and drips are a waste of your time. Instead, apply several thin, light layers. It might take longer, but you’ll get a much smoother, more durable finish. Wait about 10 to 15 minutes between coats—enough for the surface to feel dry to the touch, but not necessarily fully cured.
- 6. Patience is the final, and perhaps hardest, step. Once you’ve applied your final coat, leave the object alone. Even if it looks dry, the paint is still settling and hardening. If you touch it too soon, you’ll leave permanent fingerprints in the finish. Let it sit in a dust-free area for at least 24 hours before you start using it again. Stick to the schedule, and you’ll end up with a result you’re actually proud of.
Skip the Mess Essential Spray Paint Surface Preparation
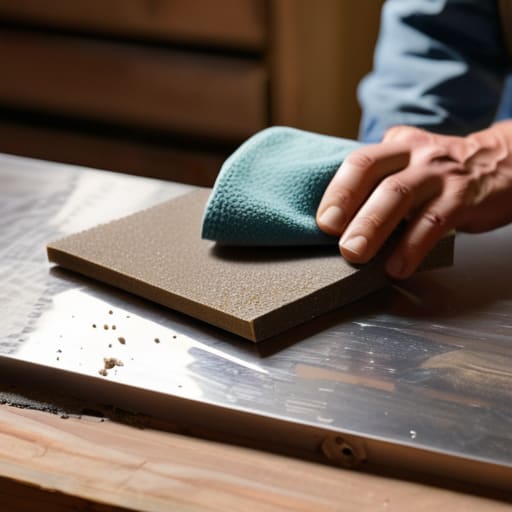
Look, I’ve spent way too many Saturday afternoons cleaning up dried paint blobs because I rushed the prep work. If you want to avoid that frustration, you need to treat spray paint surface preparation as the most important part of the entire process. It’s tempting to just grab a can and start spraying, but if there’s even a trace of dust, oil, or old grease on your item, the paint won’t bond. I always keep a pack of fine-grit sandpaper and some degreaser in my kit; a quick scrub and a thorough wipe-down are non-negotiable if you’re aiming for a professional look.
Once the surface is clean and dry, don’t skip the foundation. Using a high-quality spray paint primer and sealer acts as the bridge between your object and the color, filling in microscopic imperfections that would otherwise ruin your hard work. Think of it like setting up a clean workspace for a mechanical build—if the base isn’t level, the final product will never be right. Taking these extra ten minutes now is the only way to ensure you’re achieving a smooth finish that actually lasts.
The Pro Secret to Achieving a Smooth Finish Every Time
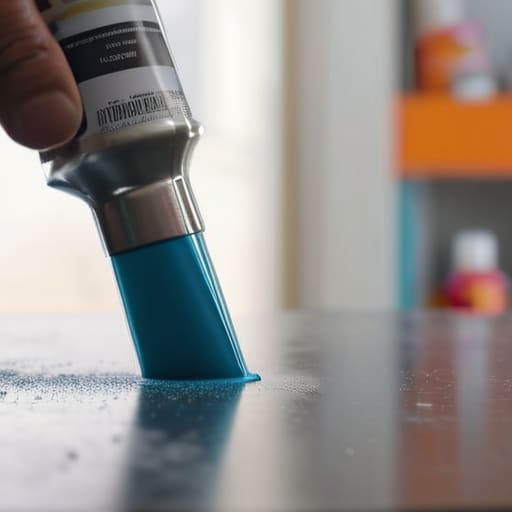
If you’ve ever finished a project only to find it looks more like a textured orange peel than a professional finish, you aren’t alone. The real difference between a DIY disaster and a factory-look result isn’t the brand of paint—it’s your patience. Most people try to cover the entire surface in one heavy, glorious coat, but that is a recipe for failure. To truly master achieving a smooth finish, you have to embrace the “mist” method. Think of your first pass as a mere veil of color rather than actual coverage. By applying several ultra-thin layers instead of one thick one, you give the paint time to level out naturally before it dries.
This is also where most people fail at preventing spray paint drips. If you see a bead of liquid forming, you’ve already waited too long; you’ve applied too much too fast. Keep your can moving in consistent, sweeping motions, and always start and stop your spray off the edge of the object. This prevents that dreaded pooling at the ends. It feels counterintuitive to keep spraying when you can still see the old color underneath, but trust the process. Small, controlled layers are the only way to reclaim your time from the inevitable cycle of sanding down mistakes.
Five Mistakes That’ll Ruin Your Weekend (And How to Avoid Them)
- Stop treating the spray can like a garden hose. It’s not about volume; it’s about thin, even passes. If you try to cover the whole surface in one heavy coat, you’re just asking for drips that will haunt you for days.
- Check the weather before you even open a can. High humidity or a sudden breeze is the fastest way to end up with a tacky, textured mess. If the air is heavy, wait for a dry, calm day.
- Don’t forget to shake the can like your life depends on it. I see people skip this all the time, but if those pigments aren’t perfectly suspended, you’ll get blotchy patches that no amount of sanding can fix. Give it a solid two minutes of vigorous shaking.
- Watch your distance. Too close and you get runs; too far and the paint dries in the air before it even hits the surface, leaving you with a gritty, sandpaper feel. Aim for about 8 to 12 inches—consistent and steady.
- Always start your spray pattern off the object. Start spraying in the air to the side, sweep across your target, and stop spraying once you’ve cleared the other side. This prevents those awkward buildup spots at the edges of your project.
The Bottom Line: Don't Overcomplicate the Process
Prioritize the prep work; if you rush the cleaning and sanding, you’ll spend more time fixing drips and grit than you saved by skipping it.
Think in thin layers, not one heavy coat; it’s better to do three quick, light passes than to end up with a gummy, uneven mess that never dries.
Control your environment to control your results; a steady hand and a controlled space are the difference between a professional finish and a frustrating waste of paint.
The Philosophy of the Finish
“Spray painting isn’t about the paint itself; it’s about the discipline of the prep work. If you rush the cleaning or skip the sanding, you aren’t saving time—you’re just scheduling a future headache of peeling flakes and uneven textures.”
Liam Anders Chen
Final Thoughts Before You Start
At the end of the day, mastering spray paint isn’t about having a professional studio setup; it’s about respecting the process. If you remember to prep your surfaces thoroughly, keep your cans moving in steady strokes, and avoid the temptation to rush through multiple coats, you’ve already won half the battle. Don’t let the fear of a drip or a missed spot stop you from starting. Just focus on the fundamentals of technique and the patience required to let each layer dry. When you stop fighting the tools and start working with them, the results speak for themselves.
I’ve spent a lot of my life trying to optimize everything, from my workspace to my daily schedule, and I’ve learned that the best systems are the ones that actually work in the real world. Spray painting is one of those things—it’s a skill that turns something tired and outdated into something functional and beautiful with relatively little friction. Don’t get bogged down in the pursuit of absolute perfection; instead, aim for intentional progress. Get out there, get your hands a little dirty, and reclaim something old by making it new again. You’ve got this.
Frequently Asked Questions
How do I know if I've applied too much paint and risk those annoying drips or runs?
The best way to tell is to watch the surface as you move. If you see the paint starting to look “wet” or heavy—like a thick glaze rather than a fine mist—you’re pushing it. If you see any pooling or a slight shimmer that looks thicker than the rest, stop immediately. It’s much easier to add a second, thin coat later than it is to sand out a stubborn drip tomorrow.
Can I actually spray paint something that's already been painted, or do I have to strip it back to the bare material?
You don’t need to strip it back to the bare material unless the existing finish is peeling, cracked, or heavily textured. That’s a massive waste of your time. If the old paint is still structurally sound, just give it a thorough cleaning and some light sanding to create “tooth” for the new layer to grab onto. As long as you prep the surface properly, you can paint right over it without any issues.
What’s the best way to handle the smell and fumes if I’m working in a small apartment or a garage with limited airflow?
If you’re working in a tight apartment or a cramped garage, don’t just wing it—the fumes will wreck your focus (and your lungs). My rule is simple: ventilation is non-negotiable. Set up a box fan in the window to pull air out, and if you’re indoors, keep the door propped open. Most importantly, grab a respirator with organic vapor cartridges. A cheap dust mask won’t cut it. Protect your space and your health.
