I was staring at a blank, white wall for twenty minutes last Tuesday, surrounded by a pile of expensive frames and a handful of mismatched nails, feeling completely defeated. It’s funny how something as simple as learning how to hang a picture can turn into a chaotic, time-sucking mess if you don’t have a system. I’ve spent way too many Saturday mornings fighting with crooked levels and staring at extra holes in my drywall because I rushed the process. I realized then that most people don’t need a degree in interior design; they just need to stop guessing where the stud is and start using the right tools for the job.
In this guide, I’m stripping away the fluff and the complicated DIY jargon to give you a streamlined workflow. I’ll show you exactly how to prep your space, select the right hardware for your wall type, and execute the hang with mathematical precision. My goal isn’t just to help you get art on your walls, but to help you do it efficiently so you can stop managing your home and start actually enjoying it.
Table of Contents
- Step-by-Step Instructions
- Choosing the Right Tools a Wall Mounting Hardware Guide
- Command Strips vs Nails Picking the Path of Least Resistance
- Pro Moves to Avoid the "One-Inch-Off" Nightmare
- The Bottom Line: Less Stress, Better Walls
- The Philosophy of the Perfect Placement
- Done and Dusted
- Frequently Asked Questions
Guide Overview
Tools & Supplies
- Hammer (for driving nails)
- Pencil (for marking placement)
- Tape measure (for measuring distance)
- Level (to ensure straightness)
- Picture hanging hardware (1 pack of nails or hooks)
- Picture frame (1 unit)
Step-by-Step Instructions
- 1. First, clear your workspace and gather your gear. I never start a project without checking my kit; you’ll need a level, a pencil, a hammer, and a drill if you’re going into studs or using anchors. If you’re dealing with a heavy frame, don’t even think about using a tiny finishing nail—get the right hardware before you make the first mark.
- 2. Measure the distance from the top of the frame to the hanging hardware on the back. Most people make the mistake of marking the wall exactly where they want the top of the frame to sit, only to realize the wire or bracket is two inches lower. Use your pencil to mark that offset point on the wall so there are no surprises once the frame is up.
- 3. Find your anchor point. If you’re lucky enough to hit a wooden stud, you’re golden—just drive your screw straight in. If you’re hitting drywall, don’t just force a nail into it; it’ll eventually sag and leave a mess. Grab a drywall anchor to ensure the weight is distributed properly and your art stays exactly where you put it.
- 4. Double-check your alignment with a level. Once your hook or screw is in, hold the frame up (or use a piece of painter’s tape to mimic the frame’s footprint) and place your level on top. It might feel tedious, but five seconds of leveling saves you from the headache of staring at a crooked room for the next three months.
- 5. Hang the piece and do a “stress test.” Gently press on the bottom corners of the frame to make sure it’s seated firmly on the hardware. If it feels wobbly or shifts too easily, your hardware isn’t deep enough or your anchor isn’t secure. It’s much easier to fix it now than to replace a shattered glass frame later.
- 6. Clean up the debris and step back. Sweep up the tiny bits of drywall dust and put your tools back in your bag. The goal wasn’t just to hang a picture; it was to complete the task efficiently so you can get back to your life without a pile of clutter left in your wake.
Choosing the Right Tools a Wall Mounting Hardware Guide
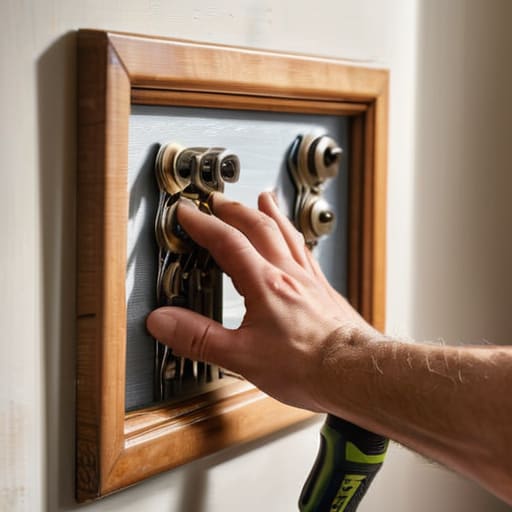
Before you start drilling holes, you need to look at what you’re actually working with. If you’re hanging art on drywall, the “one size fits all” approach is a recipe for a hole-filled mess. For lightweight frames or posters, I usually reach for Command strips; they’re great for renters who want to avoid permanent damage. However, if you’ve got a heavy, vintage wooden frame, don’t gamble with adhesive. You’ll want to use a proper screw and anchor setup to ensure it doesn’t end up on the floor halfway through the night.
Think of this as your personal wall mounting hardware guide: match the weight of the piece to the strength of the fastener. If you’re planning a larger gallery wall arrangement, consistency is your best friend. I always keep a small stash of uniform hooks in my kit so the hardware doesn’t distract from the art itself. Don’t overcomplicate it—just pick the right tool for the job, and you won’t have to spend your weekend fixing mistakes.
Command Strips vs Nails Picking the Path of Least Resistance
This is where most people second-guess themselves, and honestly, I don’t blame them. If you’re working with a lightweight frame or a canvas, command strips vs nails isn’t even a real debate—just go with the strips. They’re perfect for hanging art on drywall when you’re renting or if you’re prone to rearranging your space every few months. Just follow the instructions to a T; if you don’t clean the surface with alcohol first, they will fail, and you’ll be left cleaning adhesive off your walls.
However, if you’re dealing with something substantial—think a heavy wooden frame or a vintage mirror—don’t gamble with adhesive. You need the mechanical security of a nail or a screw. There’s a specific kind of peace of mind that comes from knowing a piece is physically anchored into the structure. When you’re planning a complex gallery wall arrangement, I usually mix both: strips for the smaller, lighter accents and nails for the heavy hitters. It’s all about choosing the right tool for the specific weight, ensuring your decor stays exactly where you put it.
Pro Moves to Avoid the "One-Inch-Off" Nightmare
- Stop guessing with your eyes. Even if you think you’ve got it, grab a level. A picture that’s just slightly tilted is a constant, nagging distraction that ruins the clean lines of a room.
- Use painter’s tape to map it out first. Before you even touch a hammer, put some blue tape on the wall where you think the frame will sit. It lets you visualize the scale and spacing without leaving a single hole in your drywall.
- Don’t forget the “Eye Level” rule. Most people hang art way too high. Aim for the center of the piece to be about 57 to 60 inches from the floor—that’s the standard gallery height that actually feels natural to the human eye.
- Measure twice, nail once. Use a pencil to mark exactly where the wire or the hook needs to go, not just where the top of the frame sits. I’ve lost too many good frames to “eyeballing” the mounting point.
- Account for your furniture. If you’re hanging something above a sofa or a sideboard, leave a few inches of breathing room between the bottom of the frame and the top of the furniture. You want the art to feel connected to the piece below it, not floating aimlessly toward the ceiling.
The Bottom Line: Less Stress, Better Walls
Don’t overthink the hardware; pick the right tool for the weight and the wall type the first time so you aren’t patching holes all weekend.
Measure twice, mark once, and use a level—it takes thirty seconds now but saves you from staring at a crooked frame for the next six months.
Prioritize the result over the process; the goal isn’t to become a master carpenter, it’s to get the art up and reclaim your evening.
The Philosophy of the Perfect Placement
Hanging a picture isn’t about achieving museum-grade precision; it’s about removing the friction between your living space and your peace of mind. Don’t let a crooked frame or a missing nail turn a simple task into a weekend-long project. Get it straight, get it secure, and get back to actually enjoying your home.
Liam Anders Chen
Done and Dusted
At the end of the day, hanging a picture shouldn’t feel like a high-stakes engineering project. We’ve covered the essentials: pick the right hardware so you aren’t fighting your drywall, decide between the permanence of a nail or the ease of a Command Strip, and always, always double-check your level before you commit. It’s about having the right tools in your kit so you can move through the task with intention rather than frustration. Once you have a system for these small home maintenance wins, you stop seeing your living space as a list of chores and start seeing it as a place you actually want to spend your time.
My philosophy has always been that the goal isn’t just to have a perfectly decorated home; it’s to remove the friction that keeps you from enjoying it. Don’t let a blank wall or a crooked frame become another source of mental clutter in your schedule. Get the hardware in, secure the art, and reclaim your afternoon. Your home should be a sanctuary that serves you, not a collection of unfinished projects that demand your constant attention. Now that the work is done, go grab a coffee, sit back, and actually enjoy the view.
Frequently Asked Questions
What do I do if I accidentally drill a hole in the wrong spot?
Don’t panic—it happens to the best of us. If you’ve missed the mark, the goal is to minimize the evidence. If it’s a small hole in drywall, a tiny bit of spackle and a damp cloth will do the trick. If it’s a larger gap, you might need to patch it, sand it smooth, and touch up the paint. Just don’t try to “hide” it by shifting the art to a new, awkward spot. Fix the hole first, then reset.
How do I know if my wall is drywall, plaster, or something else before I start?
Before you drive a single nail, you need to know what you’re working with. Take a small pin or a thin screwdriver and press it into the wall. If it sinks in easily, it’s drywall. If it feels rock-hard and resists, you’re likely dealing with plaster. For a definitive answer, tap the wall; a hollow sound means drywall, while a solid, dense thud usually signals plaster or masonry. Don’t guess—it’s not worth the repair later.
Is there a trick to getting heavy mirrors to stay level without losing my mind?
The secret is to stop eyeballing it and start using a “placeholder” system. I never trust my hands to hold a heavy mirror while I’m fumbling for a drill. Instead, I use painter’s tape to mark exactly where the mounting hardware needs to go on the wall first. Once the holes are drilled and the hardware is set, the mirror practically installs itself. It saves your back and your sanity.
