I was halfway through my second Saturday of staring at a patch of stubborn, weed-choked clay when I realized I was doing it all wrong. I had spent more time fighting the soil than actually enjoying the outdoors, and frankly, my back was paying the price. Most people think you need a degree in agronomy or a massive budget to start growing your own food, but that’s just noise. Learning how to build a raised garden bed isn’t about complex landscaping; it’s about creating a controlled environment that works for you, not against you.
I’ve spent years optimizing systems in my professional life, and I apply that same logic to my backyard. I’m not here to give you a twenty-page manual filled with unnecessary fluff or expensive, specialized equipment you’ll never use again. Instead, I’m going to show you a streamlined, repeatable process to get your garden up and running with minimal friction. We’re going to focus on the essential tools, the right materials, and a layout that actually makes sense for a busy schedule. Let’s get this built so you can stop managing the dirt and start enjoying the harvest.
Table of Contents
- Step-by-Step Instructions
- Choosing the Best Wood for Raised Beds Without the Headache
- The Perfect Raised Bed Soil Mix Ratio for Maximum Growth
- Five Small Adjustments to Save You a Massive Headache Later
- The Bottom Line: Keep It Simple and Start Growing
- The Philosophy of the Build
- Getting Your Hands Dirty
- Frequently Asked Questions
Guide Overview
Tools & Supplies
- Measuring tape for marking wood lengths
- Power drill for driving screws
- Handsaw or miter saw for cutting wood
- Level to ensure even ground
- Untreated cedar or redwood boards (approx. 4-6 pieces)
- Wood screws (box of 2.5-inch exterior grade)
- Garden soil and compost (enough to fill volume)
- Hardware cloth or landscape fabric (to prevent pests/weeds)
Step-by-Step Instructions
- 1. First, let’s talk materials. Don’t overthink this, but don’t cheap out either. I recommend grabbing four pieces of untreated cedar or redwood; they’re naturally rot-resistant, so you won’t be rebuilding this in two seasons. You’ll also need a box of 3-inch exterior-grade wood screws and a drill. Avoid pressure-treated wood if you’re planning on growing edibles—I’d rather not have chemicals leaching into my tomatoes. Just get the right tools once so you aren’t running back to the hardware store halfway through.
- 2. Once you have your lumber, it’s time to prep the site. Find a spot that gets at least six to eight hours of sunlight, and for heaven’s sake, make sure it’s level. I always bring my small level from my bag to check the ground before I even touch a screw. If the ground is uneven, your bed will be crooked, and water will pool in one corner, turning your soil into a swamp. Clear out any tall weeds or thick grass first to give yourself a clean slate.
- 3. Now, let’s build the frame. Lay your boards on a flat surface to form a rectangle. I usually go with a 4×8 foot layout because it’s a standard size and easy to reach into without stepping on your soil. Line up the corners and drive your screws through the face of one board into the end grain of the perpendicular one. I like to pre-drill my holes slightly to prevent the wood from splitting, especially near the edges. It takes an extra thirty seconds, but it saves you a massive headache later.
- 4. Before you move the frame into its final position, reinforce the corners. If you want this bed to last more than a few years of heavy soil pressure, drive a 4×4 wooden post into each interior corner. Screw the sideboards directly into these posts. This adds a level of structural integrity that simple butt joints just can’t match, and it keeps the sides from bowing outward as the dirt settles.
- 5. Once the frame is standing and leveled in its permanent home, it’s time for the barrier. Lay down a layer of heavy-duty cardboard at the bottom of the bed. This is my favorite “low-tech” hack; the cardboard will smother the existing grass and weeds underneath, but eventually, it will rot away, allowing worms to move up into your new garden. It’s a simple, effective system that eliminates the need for messy landscape fabric.
- 6. Finally, we fill it. Don’t just grab the cheapest topsoil you can find at the big-box store; that’s a recipe for poor drainage and stunted growth. I use a mix of one-third compost, one-third peat moss or coconut coir, and one-third vermiculite. This creates a lightweight, nutrient-dense environment that stays aerated. Fill the bed to about two inches below the rim, and you’re officially ready to plant.
Choosing the Best Wood for Raised Beds Without the Headache
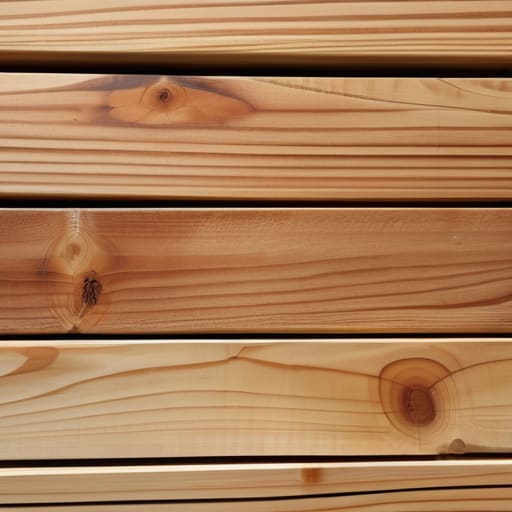
When you’re standing in the lumber aisle, the sheer number of options can feel like a massive waste of mental energy. You want something that lasts, but you don’t want to overthink it. In my experience, the debate usually boils down to cedar vs pressure treated lumber. Cedar is the gold standard because it’s naturally rot-resistant and doesn’t leach anything into your soil, which is ideal if you’re growing edibles. It’s more expensive, sure, but if you view your garden as a long-term system, the durability makes it a better investment for your time.
If you’re on a tighter budget, modern pressure-treated wood is a viable alternative, provided you look for newer, ACQ-treated options that are safer for organic gardening. However, if you go the budget route, just be prepared to replace the boards a few years sooner. My rule of thumb is to choose based on your maintenance tolerance: if you want to build it once and forget about it, go with cedar. If you don’t mind a little upkeep to save some cash now, the treated stuff will get the job done without the headache.
The Perfect Raised Bed Soil Mix Ratio for Maximum Growth
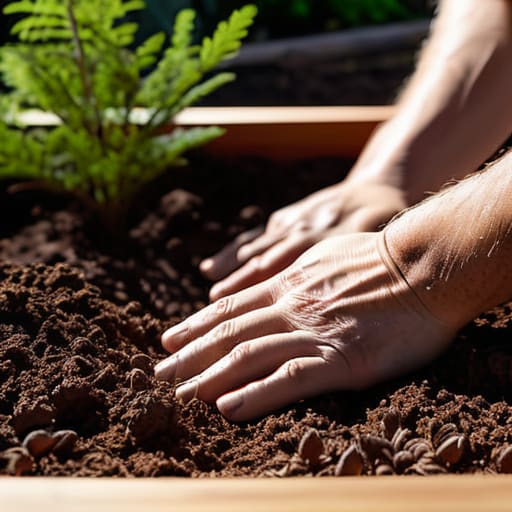
Once you’ve finished the heavy lifting with your lumber, it’s tempting to just grab a few bags of cheap topsoil and call it a day. Don’t do that. If you want your plants to actually thrive instead of just surviving, you need a high-performance foundation. I like to think of the soil as the engine of your garden; if the fuel is junk, the machine won’t run. The most reliable raised bed soil mix ratio I’ve found through trial and error is the “one-third rule”: one part high-quality compost, one part peat moss or coconut coir, and one part vermiculite or perlite.
This specific blend ensures you aren’t just feeding the plants, but also managing the structural integrity of the bed. The organic matter provides the nutrients, while the coco coir and perlite act as essential drainage solutions that prevent the soil from compacting into a brick. Compacted soil is a silent killer—it suffocates roots and turns your hard work into a muddy mess. By getting this ratio right from the start, you’re building a self-sustaining system that requires less maintenance and delivers much better yields.
Five Small Adjustments to Save You a Massive Headache Later
- Don’t skip the leveling process; if your base isn’t flat, the water will pool in one corner and turn your hard work into a swamp, killing your plants before they even start.
- Line the bottom with hardware cloth if you have critters in your area; it’s much easier to stop a mole or a gopher now than to try and chase them out once your expensive soil is already in place.
- Pre-drill every single hole before you drive a screw; I’ve learned the hard way that forcing a screw into the end of a board is the fastest way to split your wood and waste your afternoon.
- Keep your bed dimensions manageable—aim for a width of no more than four feet so you can actually reach the center from either side without stepping on and compacting your soil.
- Invest in high-quality exterior-grade screws rather than cheap ones; nothing kills my momentum like a snapped screw head halfway through a build when I’m just trying to get the job done.
The Bottom Line: Keep It Simple and Start Growing
Don’t overthink the wood or the tools; grab some rot-resistant cedar or redwood, get your boards cut, and get them in the ground so you can stop planning and start planting.
Your soil is your most important investment, so don’t skimp on the quality—a balanced, well-draining mix is the difference between a struggle and a harvest.
Focus on building a system that works for your schedule, not a complex garden project that becomes another chore on your to-do list.
The Philosophy of the Build
A raised bed isn’t just a box of dirt; it’s a system designed to eliminate the friction between you and your food. If you build it with precision and skip the unnecessary complexity, you stop fighting the landscape and start actually growing.
Liam Anders Chen
Getting Your Hands Dirty
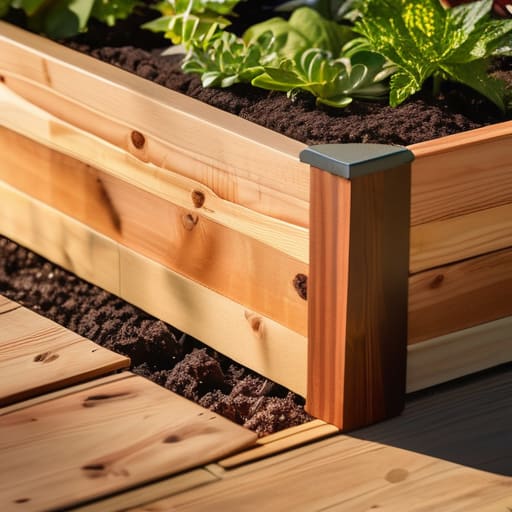
At this point, you’ve done the heavy lifting. You’ve picked the right wood that won’t rot on you in a year, you’ve mastered the soil mix ratio that actually feeds your plants, and you’ve assembled a solid structure that won’t warp the moment it hits the rain. Building a raised bed isn’t about achieving some professional landscaping perfection; it’s about creating a controlled environment where you can actually succeed. By stripping away the guesswork and focusing on these core fundamentals, you’ve turned a chaotic backyard project into a repeatable system that is ready for planting.
Now, the real work—the fun part—begins. Don’t get stuck in “analysis paralysis” trying to decide exactly where every single seed should go. The goal here was to reclaim your time and reduce the friction between you and your hobby. You built the foundation so that you can stop worrying about the logistics and start enjoying the harvest. Put down the notebook, leave the screwdriver in your bag, and just start planting. You’ve built a tool that works; now go out there and actually live the life you’re growing.
Frequently Asked Questions
How do I stop weeds from growing up through the bottom of the bed in the first place?
Don’t let weeds turn your new project into a constant chore. Before you dump in that perfect soil mix, line the bottom with a thick layer of corrugated cardboard. It’s a simple, zero-cost barrier that smothers existing grass and weeds. As it breaks down, it actually improves your soil structure. If you’re dealing with aggressive roots, go with a heavy-duty landscape fabric instead—just make sure it’s high quality so it doesn’t tear.
Do I really need to line the inside with plastic, or will that just mess up my soil drainage?
Short answer: Skip the plastic. If you line the bottom and sides with plastic, you’re essentially creating a bathtub that will drown your roots and kill your soil’s drainage. You want that water moving freely. If you’re worried about the wood rotting faster, just use cedar or redwood—they handle moisture naturally. Focus on the soil quality instead; that’s where the real magic happens, not in a plastic liner.
What’s the best way to level the ground so my bed doesn't end up looking crooked after the first rain?
Don’t let a lopsided bed ruin the clean lines of your garden. First, clear the area of any big rocks or clumps. Use a long, straight 2×4 as a makeshift level across the footprint of your bed. If one side is high, scrape the soil away; if it’s low, add a bit more. It’s tedious, but getting that base flat now saves you the headache of a tilting garden later.
