I was staring at a pile of sawdust and a crooked piece of oak on my living room floor, wondering why I’d ever thought I could do this myself. My first attempt at floating shelves diy was a total disaster; the brackets were uneven, the drywall was crumbling, and I felt like I was fighting my own home instead of improving it. I realized then that most tutorials skip the most important part: the mechanical reality of what’s happening behind your walls. You don’t need a workshop full of expensive power tools, but you do need a system that accounts for gravity and load-bearing limits before you even pick up a drill.
In this guide, I’m stripping away the fluff to show you how to get professional, clean results without the unnecessary stress. I’ll walk you through selecting the right hardware, finding your studs, and executing a flawless installation that won’t sag after a week. My goal is to help you stop guessing and start building, so you can finally clear that countertop clutter and actually enjoy your organized space.
Table of Contents
- Step-by-Step Instructions
- Mastering Modern Floating Shelf Design Without the Stress
- The Essential Woodworking Tools for Shelving You Actually Need
- Pro Moves to Keep Your Shelves From Becoming a Liability
- The Bottom Line: Less Stress, Better Shelves
- The Philosophy of Space
- Final Thoughts Before You Mount
- Frequently Asked Questions
Guide Overview
Tools & Supplies
- Drill/Driver for mounting brackets and screws
- Level to ensure shelves are straight
- Stud finder to locate wall support
- Saw for cutting wood to length
- Sandpaper for smoothing edges
- Wood planks (1-2 boards)
- Floating shelf brackets (1 set per shelf)
- Wall anchors or heavy-duty screws
- Wood stain or paint
- Wood glue (optional)
Step-by-Step Instructions
- 1. Before you even touch a drill, you need to map out your layout. I’ve learned the hard way that “eyeballing it” is a recipe for a crooked shelf and a wasted afternoon. Grab your pencil and a level, and mark exactly where you want the top and bottom of the shelf to sit. I always recommend marking the center point of where the bracket will go, too—it saves you from having to erase and redraw lines later.
- 2. Next, we need to find the studs in your wall. Floating shelves put a lot of leverage on a single point, and if you try to hang them with just drywall anchors, they will eventually sag or pull right out of the wall. Use a stud finder to locate the wooden framing behind the drywall. If your desired placement doesn’t line up with a stud, don’t panic—you’ll just need to use heavy-duty toggle bolts, but hitting a stud is always the gold standard for stability.
- 3. Now, it’s time to drill your pilot holes. Using a drill bit that is slightly smaller than your screws is the trick to avoiding cracked wood or stripped holes. Start with the holes for your mounting bracket first. I like to go slow here; you want to feel the drill bite into the wood so you know you’re on the right track before you commit to the depth.
- 4. Secure the mounting bracket to the wall. This is the backbone of your entire project, so don’t rush it. Drive your screws through the bracket and into the studs (or anchors) until the bracket is flush against the wall. If there is even a tiny gap between the bracket and the drywall, the shelf will feel wobbly, and that’s the last thing we want when we start adding books or decor.
- 5. Slide the shelf sleeve over the bracket. Most DIY kits are designed this way—the shelf acts as a hollow sleeve that fits snugly over the protruding arms of the bracket. Give it a firm push to ensure it’s seated completely. If it feels like it’s sticking, don’t force it blindly; check to see if the bracket is level or if there’s some debris in the way.
- 6. Lock it in place. Many floating shelf systems include small set screws on the underside of the shelf. Use that precision screwdriver I always keep in my bag to tighten those screws against the bracket. This prevents the shelf from sliding forward or tilting when you place weight on it. It’s a small step, but it’s the difference between a shelf that looks professional and one that feels flimsy.
- 7. Finally, clear the workspace and style your shelf. Now that the hard part is over, you can actually enjoy the result. I usually keep my shelf decor minimal—maybe a single plant and a few well-placed books—to maintain that clutter-free aesthetic I’m always chasing. If it looks good and stays steady, you’ve done your job.
Mastering Modern Floating Shelf Design Without the Stress
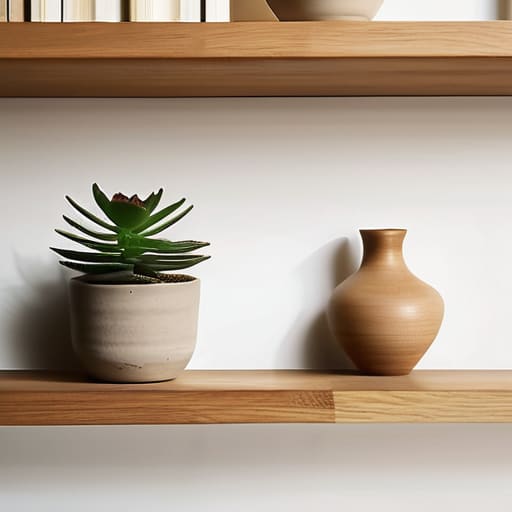
When it comes to modern floating shelf design, the biggest mistake I see is people overcomplicating the aesthetic. You don’t need a complex architectural plan to make these look high-end; you just need to respect the lines. I always tell myself that less is more. If you’re going for that clean, minimalist look, skip the chunky, decorative corbels and opt for hidden shelf brackets. They do the heavy lifting behind the scenes, allowing the wood to appear as if it’s truly levitating. It keeps the visual noise to a minimum, which is exactly how I approach my own workspace.
The real secret to a stress-free install, though, isn’t just about the look—it’s about the physics. Before you even touch a drill, you need to be certain about mounting shelves to studs. If you try to rely on drywall anchors alone for anything heavier than a single succulent, you’re going to end up with a hole in your wall and a pile of broken ceramics on the floor. Take the extra five minutes to locate your studs or use a high-quality mounting system. It’s much better to spend a little more time on the prep than to spend your weekend fixing a failed installation.
The Essential Woodworking Tools for Shelving You Actually Need
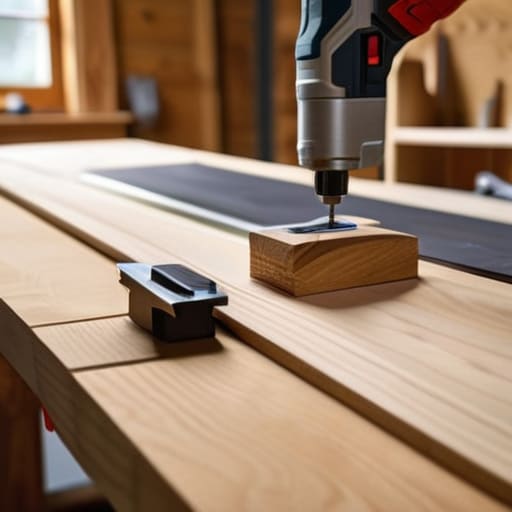
Look, you don’t need a professional-grade workshop to pull this off, but you do need the right kit to avoid a frustrating afternoon of wasted wood. When I’m prepping for a custom wood shelf installation, I always start with a solid drill and a high-quality level. If your level is cheap or won’t hold its calibration, you’re going to end up with a shelf that looks tilted, and trust me, that’s a mental drain you don’t need. I also swear by a reliable stud finder; skipping this step is the fastest way to turn a simple project into a drywall repair nightmare.
Beyond the basics, make sure you have a sharp chisel and some decent sandpaper ready. Even if you’re using pre-cut lumber, a little manual refinement goes a long way in achieving that clean, minimalist look. Most importantly, pay attention to your mounting shelves to studs strategy. If you’re using heavy-duty hidden shelf brackets, your precision with the drill matters more than anything else. Get the holes right the first time, and you’ll spend your evening enjoying the view rather than fixing mistakes.
Pro Moves to Keep Your Shelves From Becoming a Liability
- Find the studs or don’t bother. I’ve seen too many people try to rely on drywall anchors for heavy books, only to watch the whole thing come crashing down. If you aren’t hitting solid wood, you’re just asking for a weekend of cleaning up splinters and broken ceramics.
- Check your level twice, then check it a third time. There is nothing more frustrating than finishing a beautiful build only to realize it’s leaning three degrees to the left. Use a good spirit level, not a cheap plastic one, and don’t trust your eyes.
- Account for the “sag factor.” If you’re planning on displaying heavy tech gear or a massive collection of hardcovers, your shelf thickness and bracket strength need to match that load. Don’t build a delicate decorative piece if you intend to use it as a library.
- Sanding is where the magic—or the mess—happens. Don’t skip the fine-grit sanding before you apply your finish. If you leave the surface rough, your stain will look blotchy and unprofessional, and you’ll spend more time regretting it than enjoying the view.
- Leave a little breathing room. When you’re mounting, don’t feel like you have to cram everything into one tight cluster. Giving your shelves some visual space makes the whole room feel organized and intentional rather than cluttered and cramped.
The Bottom Line: Less Stress, Better Shelves
Don’t skip the prep work—spending ten extra minutes finding a stud is the difference between a clean display and a shelf that ends up on your floor.
Keep your tool kit lean; you don’t need a professional workshop, just the right precision and a few reliable basics to get the job done right.
Focus on the function first, then the aesthetic; a shelf is only as good as its ability to hold your gear without adding to the visual clutter.
The Philosophy of Space
“A floating shelf isn’t just about extra storage; it’s about reclaiming your visual headspace. When you strip away the bulky brackets and the clutter, you’re not just organizing a wall—you’re designing a room that actually lets you breathe.”
Liam Anders Chen
Final Thoughts Before You Mount
At the end of the day, building floating shelves isn’t about achieving woodworking perfection; it’s about creating a system that works for your space. We’ve covered the essentials—from selecting the right wood to ensuring your brackets are dead level and securely anchored into those studs. Remember, the most common mistake isn’t a slightly uneven shelf, but failing to use the right hardware for the weight you plan to carry. If you’ve followed these steps and kept your workspace organized, you’ve already done the heavy lifting. Now, it’s just about executing the final installation with the same precision you’d use for anything else in your life.
I know that starting a DIY project can feel like adding another chore to an already overflowing to-do list. But there is a specific kind of mental clarity that comes from looking at a wall and seeing something you built with your own hands. Don’t let the fear of a misplaced screw stop you from upgrading your environment. Once these shelves are up and your clutter is finally off the floor, you’ll realize that the time you spent investing in your home was time well spent. Stop overthinking the blueprint and just get to work. Your organized, functional space is waiting.
Frequently Asked Questions
How much weight can these shelves actually hold before they start sagging or pulling out of the wall?
Look, I’ve seen too many people ruin a clean aesthetic by overloading a shelf and watching it bow like a banana. Here’s the reality: it’s less about the wood and more about what’s behind your drywall. If you’re hitting studs with heavy-duty lag bolts, you can usually support 30–50 lbs easily. If you’re relying on drywall anchors, keep it light—think decor, not encyclopedias. Test your limits early so you don’t end up cleaning up broken glass.
What's the best way to hide the mounting hardware so it doesn't ruin the clean, minimalist look?
If you want that seamless, floating look, you have two real options. First, go with internal bracket systems—these are hidden entirely inside the shelf itself. It’s a bit more work to drill, but it’s the cleanest method. Alternatively, if you’re using external supports, just use color-matched wood plugs or even a bit of matching wood filler to mask the screw heads. Don’t overcomplicate it; just pick a method that keeps the lines clean.
Can I install these directly into drywall, or am I absolutely required to hit a stud every single time?
Look, I get the temptation to skip the stud-finding headache, but here’s the reality: if you’re mounting anything heavier than a single photo frame, don’t trust drywall alone. You can use heavy-duty toggle bolts for lighter loads, but for real shelving that holds books or kitchenware, hitting a stud is non-negotiable. I’d rather spend five minutes hunting for a stud now than spend my weekend cleaning up shattered wood and patched drywall later.
