It was 2:00 AM, and that rhythmic, ghostly hiss of water was doing nothing for my focus. I was halfway through a deep-work session, trying to map out my week, when that constant, wasteful sound started grating on my nerves like a dull blade. Most people think a running toilet means you need to call a plumber and drop a hundred bucks on a service fee, but that’s a lie. Usually, it’s just a small, mechanical hiccup that’s easy to solve once you strip away the noise. Learning how to fix a running toilet isn’t about mastering complex plumbing; it’s about identifying the one faulty component that’s disrupting your peace and your wallet.
I’m not here to give you a twenty-page manual or a list of expensive tools you don’t own. I’m going to show you how to diagnose the issue in minutes and apply a precision fix that actually lasts. We’ll skip the fluff and go straight to the mechanics, from checking the flapper to adjusting the float, so you can stop the leak and reclaim your mental clarity. Let’s get this sorted so you can get back to your life.
Table of Contents
- Step-by-Step Instructions
- A Toilet Tank Components Guide for Total Control
- Solve Clogged Toilet Tank Mechanism Issues Immediately
- Five Pro-Tips to Keep Your Toilet Silent and Efficient
- The Bottom Line: Stop the Leak and Reclaim Your Morning
- The Philosophy of Maintenance
- Getting Back to Your Routine
- Frequently Asked Questions
Guide Overview
Tools & Supplies
- Adjustable wrench for tightening bolts
- Screwdriver for securing components
- Sponge or towel for absorbing excess water
- Replacement flapper (1 unit)
- Replacement fill valve (1 unit)
- Replacement toilet tank repair kit (1 kit)
Step-by-Step Instructions
- 1. First, I always start by shutting off the water supply. Look behind the toilet for the small silver valve on the wall and turn it clockwise until it stops. It’s a small move, but it prevents you from turning a quick fix into a flooded bathroom floor while you’re working.
- 2. Next, open the tank lid and flush the toilet to empty as much water as possible. I like to use a sponge or an old rag to soak up the remaining bit of water at the bottom so nothing splashes when I start tinkering. You need a dry workspace to see what you’re actually doing.
- 3. Now, let’s look at the most likely culprit: the flapper. This is that rubber plug at the bottom of the tank. If it looks warped, slimy, or feels brittle, it’s not creating a watertight seal. Reach in and feel it; if it doesn’t seat firmly against the flush valve, it’s time to replace it.
- 4. Check the chain connecting the flush lever to the flapper. This is a classic “small system” failure. If the chain is too long, it can get caught under the flapper, preventing a seal. If it’s too tight, it keeps the flapper partially lifted. Adjust the clip so there’s just a little bit of slack in the line.
- 5. If the flapper seems fine, we need to inspect the fill valve and the float. The float is the mechanism that tells the water when to stop rising. If it’s set too high, the water will constantly pour into the overflow tube. Gently adjust the screw on the fill valve to lower the float level until the water stops well below the top of that tube.
- 6. Once you’ve made your adjustments, turn the water valve back on and watch the tank refill. This is the moment of truth. Listen closely—if you hear that constant, ghostly hiss, something is still misaligned. If it’s silent and the water level stays steady, you’ve successfully reclaimed your peace and quiet.
A Toilet Tank Components Guide for Total Control
Before you start turning bolts, you need to know exactly what you’re looking at inside that tank. I like to think of it like a mechanical system: every part has a specific job, and if one fails, the whole cycle breaks down. Most of the time, you aren’t dealing with a massive plumbing disaster; you’re just facing a minor part failure. This toilet tank components guide is meant to help you identify the culprits quickly. You’ve got the flapper—that rubber seal at the bottom—the fill valve that brings in the fresh water, and the overflow tube that keeps things from spilling over.
When you open the lid, look for the source of the noise. If you see water constantly trickling down the overflow tube, you likely need a toilet fill valve adjustment rather than a full replacement. However, if you notice the water level is dropping and the tank has to refill itself every few minutes, the seal is probably shot. In that case, it’s time to replace the toilet flapper to stop that constant, wasteful cycle. Knowing these parts by name takes the guesswork out of the repair and lets you move with purpose.
Solve Clogged Toilet Tank Mechanism Issues Immediately
Sometimes, the issue isn’t a single broken part, but a lack of synchronization within the tank itself. If you’ve already checked the basics and still see water trickling into the bowl, you might be dealing with a clogged toilet tank mechanism caused by mineral buildup or debris. Over time, calcium deposits can settle on the moving parts, preventing the valve from seating perfectly. I’ve found that a quick soak with a bit of white vinegar can often dissolve that grit and restore smooth operation without needing a trip to the hardware store.
If the water level is consistently too high, causing it to spill into the overflow tube, you likely need a precise toilet fill valve adjustment. Most modern valves have a screw or a sliding clip that lets you recalibrate the float height. Don’t overthink it—just turn the adjustment screw slightly until the water stops about an inch below the top of the overflow tube. It’s a small, mechanical tweak that can save you a massive amount of frustration and a spike in your water bill.
Five Pro-Tips to Keep Your Toilet Silent and Efficient
- Check the chain tension first; if it’s too long, it gets caught under the flapper, and if it’s too short, it prevents a full seal. A little slack goes a long way.
- Don’t ignore the water level in the tank. If it’s constantly spilling into the overflow tube, your fill valve is set too high—adjust the screw to bring that level down and stop the waste.
- Clean your fill valve regularly. Sometimes a tiny bit of sediment from your pipes gets stuck in the mechanism, preventing it from shutting off completely. A quick flush can save you a replacement.
- Stop buying the most expensive “fancy” parts. Most standard flappers and fill valves are universal; stick to reputable, functional brands rather than over-engineered gadgets that add unnecessary complexity.
- Keep a small toolkit handy, specifically a multi-purpose screwdriver and some replacement washers. Catching a small leak early prevents a minor annoyance from becoming a full-blown plumbing emergency.
The Bottom Line: Stop the Leak and Reclaim Your Morning
Most running toilets aren’t a plumbing disaster; they’re just a symptom of a worn-out flapper or a misaligned chain that you can fix in minutes with basic tools.
Don’t just patch the problem—identify the specific component at fault so you aren’t wasting time on trial and error.
Keep a small kit of common replacements on hand to turn a frustrating household distraction into a quick, five-minute win.
The Philosophy of Maintenance
“A running toilet isn’t just a waste of water; it’s a leak in your mental bandwidth. Fix the mechanism, reclaim your peace, and stop letting small, avoidable frictions dictate the rhythm of your day.”
Liam Anders Chen
Getting Back to Your Routine
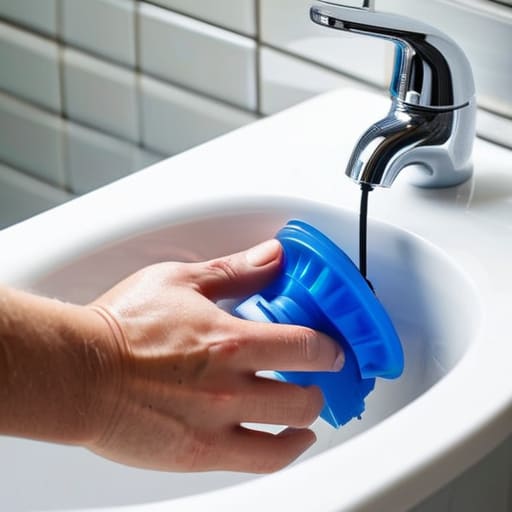
At the end of the day, fixing a running toilet usually comes down to one of three things: a misaligned float, a worn-out flapper, or a faulty fill valve. I’ve found that most of these issues don’t require a plumber’s expensive service call; they just require a bit of intentional troubleshooting and the right parts. Once you’ve identified the culprit and swapped out the faulty component, you’ve effectively eliminated a source of unnecessary noise and wasted money. It’s about identifying the friction point, applying a systematic fix, and ensuring your home’s infrastructure is working for you rather than against you.
Don’t let a minor mechanical annoyance become a permanent fixture in your mental load. We often let small, nagging problems pile up until they feel overwhelming, but the truth is that most of life’s little disruptions can be solved with a bit of patience and a single trip to the hardware store. My goal is to help you reclaim that lost time and mental energy. Once this is fixed, you can close the bathroom door, forget about the plumbing, and get back to what actually matters in your day. You’ve got this.
Frequently Asked Questions
I replaced the flapper but it's still running; could the water level in the tank be set too high?
It’s highly likely. If your water level is set too high, it’ll constantly spill into the overflow tube, making it feel like a faulty flapper when it’s actually just a calibration issue. Grab that screwdriver in my bag—or yours—and check the float valve. Adjust it so the water stops about an inch below the top of the overflow tube. It’s a simple tweak, but it’ll save you a lot of unnecessary troubleshooting.
Is there a way to tell if the fill valve is actually broken or if it just needs a quick cleaning?
It’s a fair question. Before you go buying a new part, try this: shut off the water, flush to empty the tank, and check the valve for sediment. If you see grit or mineral buildup around the seal, a quick rinse might be all it needs. However, if the valve still won’t shut off even after a cleaning, the internal diaphragm is likely shot. At that point, don’t waste your time—just replace it.
How often should I be inspecting these parts to prevent a leak from happening in the first place?
I’m a big believer in preventive maintenance over emergency repairs. I suggest doing a quick visual check every three months—just a glance inside the tank while you’re brushing your teeth. Look for any signs of mineral buildup or a flapper that looks slightly warped. If you catch a small leak early, it’s a five-minute fix with my screwdriver and a new part, rather than a midnight disaster that ruins your schedule.
